If getting down on a mat feels like a workout in itself, chair yoga might be exactly what you’ve been looking for. It delivers the same core benefits of traditional yoga, including improved flexibility, better breathing, reduced stress, and joint mobility, all without ever asking you to sit on the floor. You stay seated or use the chair for support the entire time.
This guide walks you through a beginner-friendly seated yoga flow designed specifically for older adults. Whether you’re managing arthritis, recovering from surgery, or just getting back into movement after a long break, these poses meet you where you are. We’ll cover breathing cues, step-by-step instructions, and modifications for limited mobility throughout.
Why Chair Yoga Works So Well for Seniors

Chair yoga isn’t a watered-down version of the real thing. It’s a legitimate practice with real benefits backed by research. Studies have shown that regular chair yoga can reduce pain, improve balance, and lower anxiety in older adults, sometimes more effectively than standing yoga because there’s no fear of falling.
For anyone dealing with conditions like arthritis, sciatica, or neuropathy, the seated format removes common barriers while still keeping the body moving. It also pairs beautifully with breathwork, which helps calm the nervous system and reduce muscle tension.
Even if you feel pretty mobile right now, chair yoga is a smart addition to your routine. It builds the kind of deep, functional flexibility that helps with everyday tasks like reaching overhead, twisting to look behind you, and bending without strain.
Before You Begin: Setup and Breathing Basics
Setting Up Your Chair
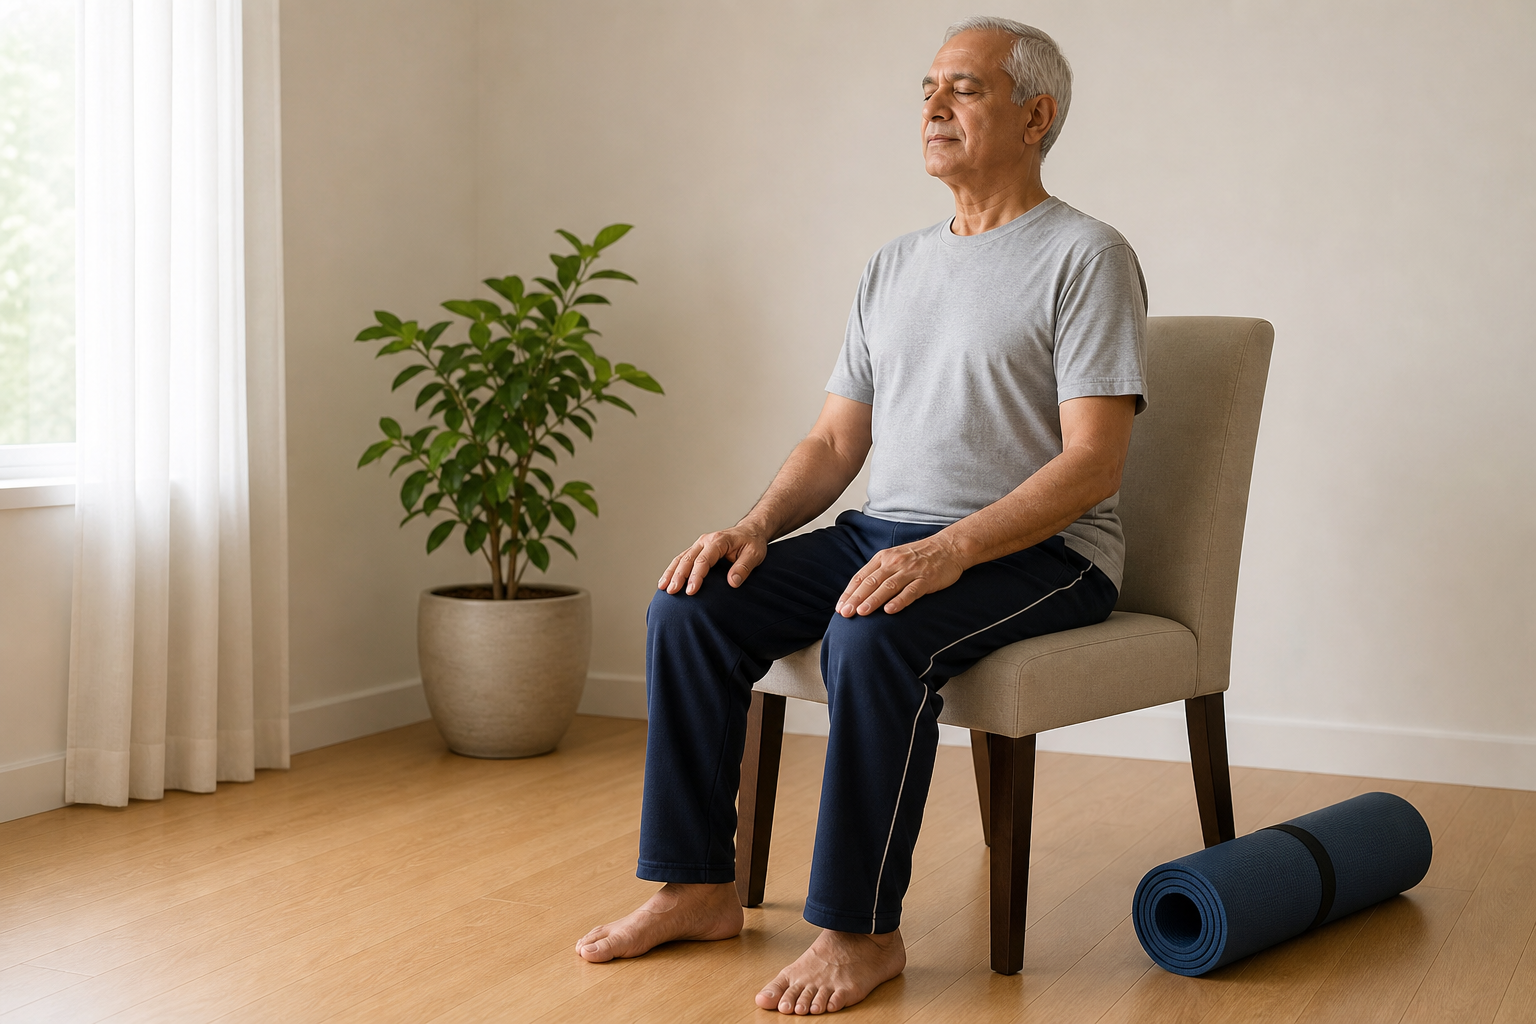
Use a sturdy, armless chair with a flat seat. A folding chair or dining chair works well. Avoid chairs with wheels or soft cushions that shift under you. Place it on a non-slip surface, and if you’re on hardwood floors, consider a yoga mat underneath the chair legs for stability.
Sit toward the front edge of the seat so your feet rest flat on the floor, hip-width apart. Don’t lean against the back of the chair unless a modification specifically calls for it. Sitting upright engages your core and helps you get more out of each stretch.
The Breathing Foundation
Before jumping into movement, spend two minutes just breathing. Inhale slowly through your nose for a count of four, then exhale through your mouth or nose for a count of five or six. Letting the exhale be slightly longer than the inhale activates your parasympathetic nervous system, which basically tells your body it’s safe to relax.
Keep returning to this breath pattern throughout the routine. When a pose feels challenging, the breath is your reset button.
The Beginner Chair Yoga Routine (Step by Step)
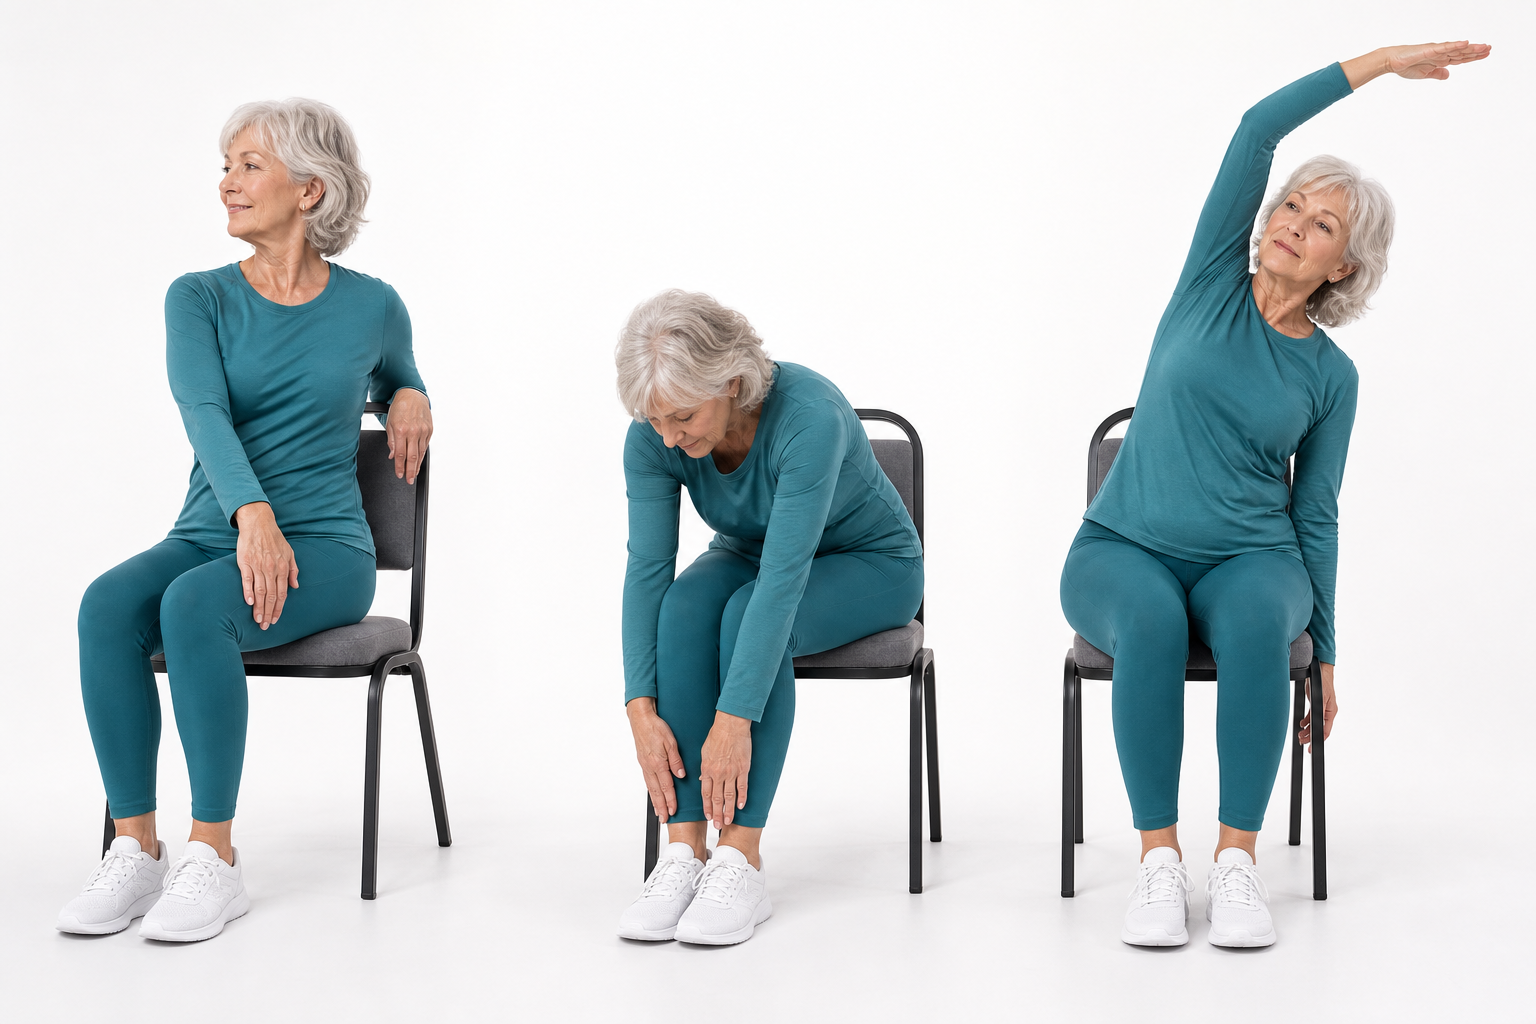
Move through this sequence slowly. There’s no rushing. Each pose is held for three to five breaths unless noted otherwise. The full routine takes about 20 to 25 minutes.
1. Seated Mountain Pose (Tadasana)
Sit tall at the front of your chair. Feet flat on the floor, hands resting on your thighs, palms down. Roll your shoulders back and down, and gently lengthen the back of your neck by tucking your chin slightly. Take three slow breaths here and feel yourself grounded and stable.
Modification: If your feet don’t reach the floor, place a folded blanket or thick book under them.
2. Seated Cat-Cow Stretch
Place your hands on your knees. On your inhale, arch your back gently, lift your chest, and look slightly upward (Cow). On your exhale, round your spine, drop your chin toward your chest, and draw your belly inward (Cat). Repeat this eight to ten times, letting the movement flow with your breath.
This is one of the best things you can do for spinal mobility and lower back stiffness. Many people with chronic back pain find this single movement makes a noticeable difference with daily practice.
3. Seated Forward Fold
From seated mountain, inhale to lengthen your spine. On the exhale, hinge at your hips and let your torso fold toward your thighs. Let your hands rest on your shins or dangle toward the floor. Hold for four to six breaths, feeling a gentle stretch through your lower back and hamstrings.
Modification: If bending forward causes dizziness or discomfort, just tilt your torso slightly forward and hold there. Even a small forward lean creates a useful stretch.
4. Seated Spinal Twist
Sit tall. Place your right hand on the outside of your left knee and your left hand on the back of the chair or the seat behind you. On your inhale, lengthen your spine. On your exhale, gently twist to the left and look over your left shoulder. Hold for three breaths, then repeat on the other side.
Move slowly into and out of twists. Never force the rotation. This pose helps decompress the spine and improves the thoracic mobility that tends to stiffen up with age. Improving forward head posture and slouching becomes much easier when you work this area regularly.
5. Seated Figure-Four (Hip Opener)
Sit tall and cross your right ankle over your left knee, flexing your right foot gently. If this alone creates enough sensation, stop here and breathe. To deepen it, hinge slightly forward at the hips. Hold for five breaths, then switch sides.
Modification: If hip or knee pain prevents the cross, simply draw one knee toward your chest and hold it there for a gentle hip flexor stretch instead.

Chair Yoga for Seniors DVD
A guided DVD program is a great way to keep variety in your home practice without needing a screen subscription.
6. Seated Warrior Arms (Shoulder and Chest Opener)
Sit tall and extend both arms out to the sides at shoulder height. Turn your palms to face forward. On the exhale, sweep your arms behind you and gently squeeze your shoulder blades together. Inhale to return to arms wide. Repeat eight times. This counters the rounded-shoulder posture that comes from sitting at computers or watching TV.
7. Seated Savasana (Closing Rest)
Rest your hands in your lap, palms facing up. Close your eyes or soften your gaze downward. Let your breath return to its natural rhythm and simply sit still for two to three minutes. This closing rest is not optional, it’s where your nervous system absorbs the benefits of the session.
Recommended Gear to Make Practice More Comfortable
You don’t need much to practice chair yoga at home, but a few simple items make a real difference in comfort and consistency.
A non-slip yoga mat placed under your chair keeps everything stable on smooth floors. A folding yoga blanket is handy for foot support or extra cushioning. And if you want guidance beyond this article, a video program you can follow along with at your own pace is worth having.

Yoga Blocks for Seated Support
Foam yoga blocks can be placed under your feet or used as arm supports to make poses more accessible for limited mobility.
If you’re building out a broader home fitness setup, our guide to a budget-friendly home gym for seniors covers the most useful equipment without overspending.
Supporting Your Practice With Good Nutrition
Even gentle movement benefits from some basic nutritional support. Joint health in particular responds well to nutrients like omega-3 fatty acids and collagen. If you’re practicing daily and noticing soreness or stiffness, our guides on omega-3 supplements for joint health and collagen for joints and skin are worth reading.
After your session, a light snack that includes protein helps your muscles recover, even after low-intensity exercise. See our article on post-workout recovery meals for seniors for simple ideas.
Frequently Asked Questions
How often should seniors do chair yoga?
Most people see good results with three to five sessions per week. Even 15 to 20 minutes daily will improve flexibility, reduce stiffness, and help with stress over time. Consistency matters more than duration, so a short daily practice beats a long occasional one.
Is chair yoga safe after hip or knee replacement?
For many people, yes, but always check with your surgeon or physical therapist first. Chair yoga avoids deep squats and floor movements that are typically restricted after joint replacement. Our detailed guide on post-hip replacement exercise covers which movements to avoid and when it’s safe to progress.
Can chair yoga help with balance problems?
Chair yoga builds the hip, core, and spinal strength that underlies good balance, so yes, it contributes meaningfully over time. If balance is a primary concern, you may also want to look at targeted vertigo and balance exercises that specifically train your vestibular system alongside your flexibility work.
This article contains affiliate links. We may earn a small commission at no extra cost to you.
