Your home should support your exercise routine, not sabotage it. Small modifications, most costing less than a single physical therapy visit, transform a fall-hazard living space into an environment where you can exercise confidently. The modifications below are organized by room and priority, starting with the changes that provide the greatest safety impact per dollar spent.
Before starting any modifications, walk through your home as if you’re seeing it for the first time. Where do you naturally reach for support? Where do shadows fall? Where have you caught your foot or felt unsteady? These are your priority zones.
High Priority: The Exercise Area
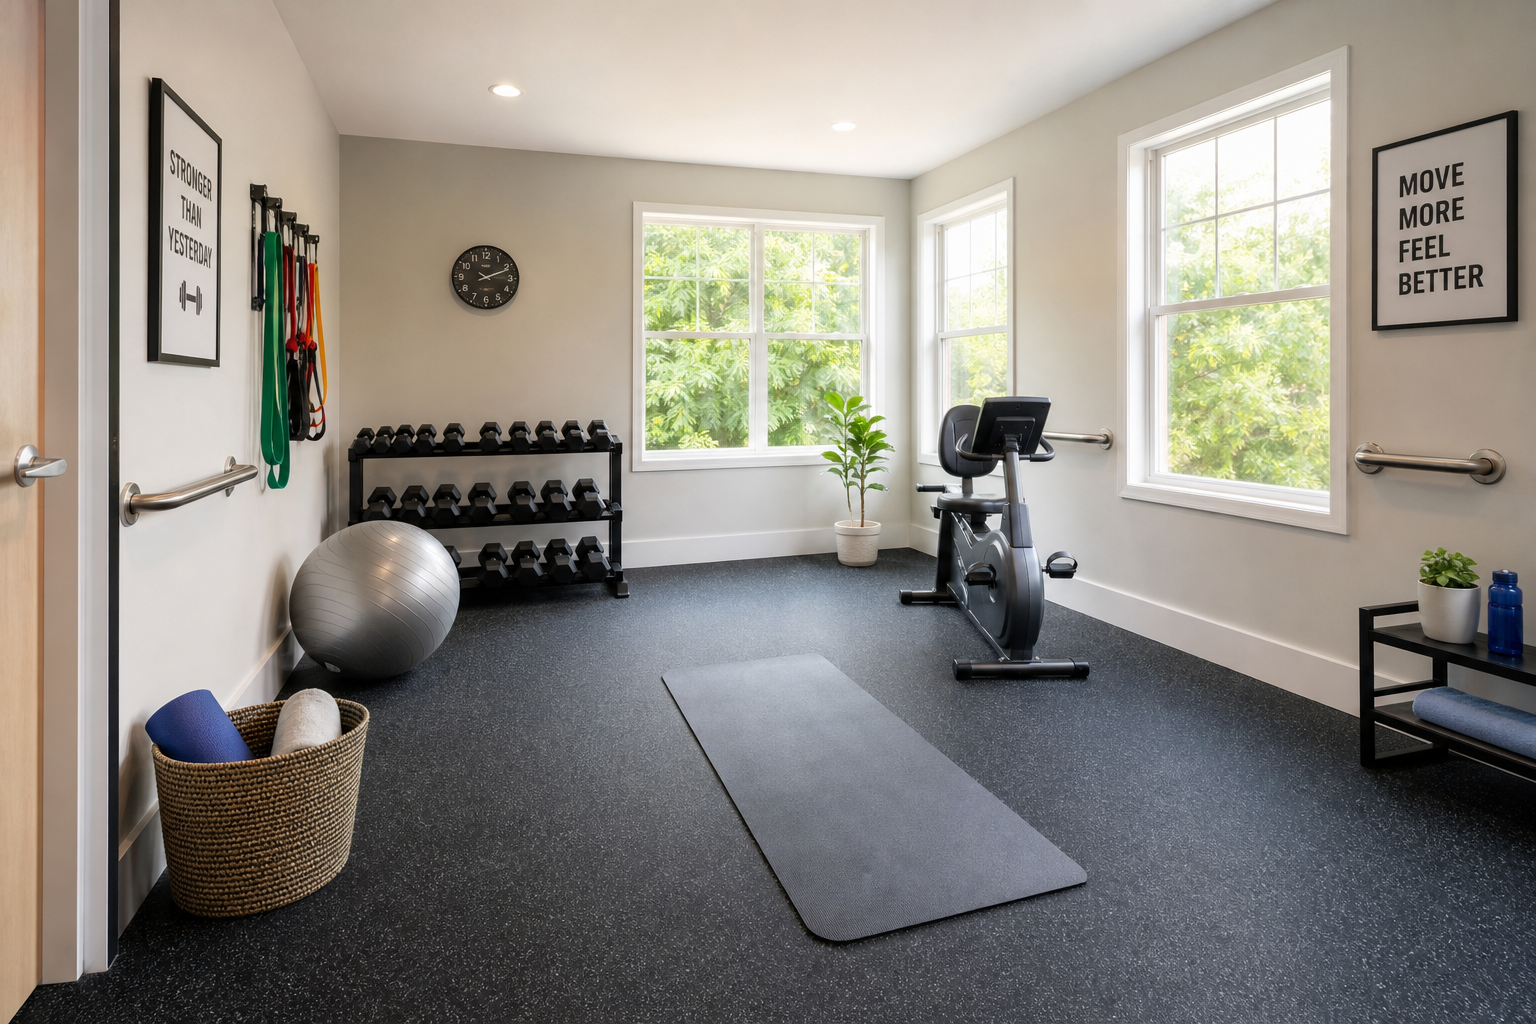
Your dedicated exercise space needs three things: stable support, secure footing, and excellent visibility.
Wall-Mounted Grab Bar
A 36-inch stainless steel grab bar anchored into wall studs at hip height (33-36 inches) provides rock-solid balance support for all standing exercises. Install it where you do balance training and strength exercises. This bar isn’t for emergencies. It’s for everyday use during single-leg stands, heel raises, and any exercise where you’re working on stability.

36-Inch Stainless Steel Grab Bar
Essential for balance training and standing exercises, properly installed in wall studs
Position it so you can face the wall with the bar at arm’s length, or install it perpendicular to where you stand if you prefer side support.
Test the wall where you want to mount the bar. Use a stud finder to locate two studs (typically 16 inches apart). The bar must anchor into studs, not drywall alone. If studs don’t line up where you need them, you have two options: move your exercise area slightly, or install a horizontal mounting board across multiple studs first, then attach the bar to that board. For more information about different types of grab bars and safety equipment for home exercise, including installation tips and weight capacity considerations.
Non-Slip Exercise Mat
A thick, non-slip mat defines your exercise space and prevents foot sliding on hard floors. Look for mats at least ¼ inch thick. Thin yoga mats don’t provide enough cushioning for joint-friendly floor exercises. The mat should be large enough for you to lie down fully with arms extended overhead.
Secure the edges with double-sided carpet tape, especially if you have hardwood or tile floors. A mat that shifts mid-exercise defeats its purpose.
Some people prefer interlocking foam tiles instead of a single mat. These cover larger areas and stay put better, but they create slight elevation changes at the seams. If you have significant balance challenges, a single continuous mat is safer.
Overhead Lighting Upgrade
Replace dim bulbs with brighter options (100-watt equivalent LED). Add a floor lamp if ceiling lighting creates shadows. Even, bright lighting throughout your exercise area improves visual balance input. Your eyes provide about 20% of the sensory information your brain uses to maintain balance. Poor lighting forces your inner ear and proprioceptive system to work harder.
Position lighting to eliminate shadows behind you and in front of you. If you only have overhead lighting, add a lamp in the corner at an angle that fills in shadow zones. Warm white bulbs (2700-3000K) are easier on aging eyes than cool white bulbs. This is especially important for those exercising with low vision or balance challenges, where adequate lighting becomes even more critical for safety.
Clear Floor Space
Remove all furniture, rugs, cords, and objects from a 6×8 foot area plus a 2-foot buffer. This is your permanent exercise zone. The buffer matters because you need space to step or reach without immediately encountering obstacles. If you lose balance slightly during an exercise, that buffer gives you room to catch yourself without hitting furniture.
Keep this space clear all the time, not just during exercise sessions. It’s tempting to stack things temporarily in your exercise area between workouts. Resist that. Maintaining a permanent clear zone reinforces the habit of exercising regularly because the space is always ready.
High Priority: The Bathroom
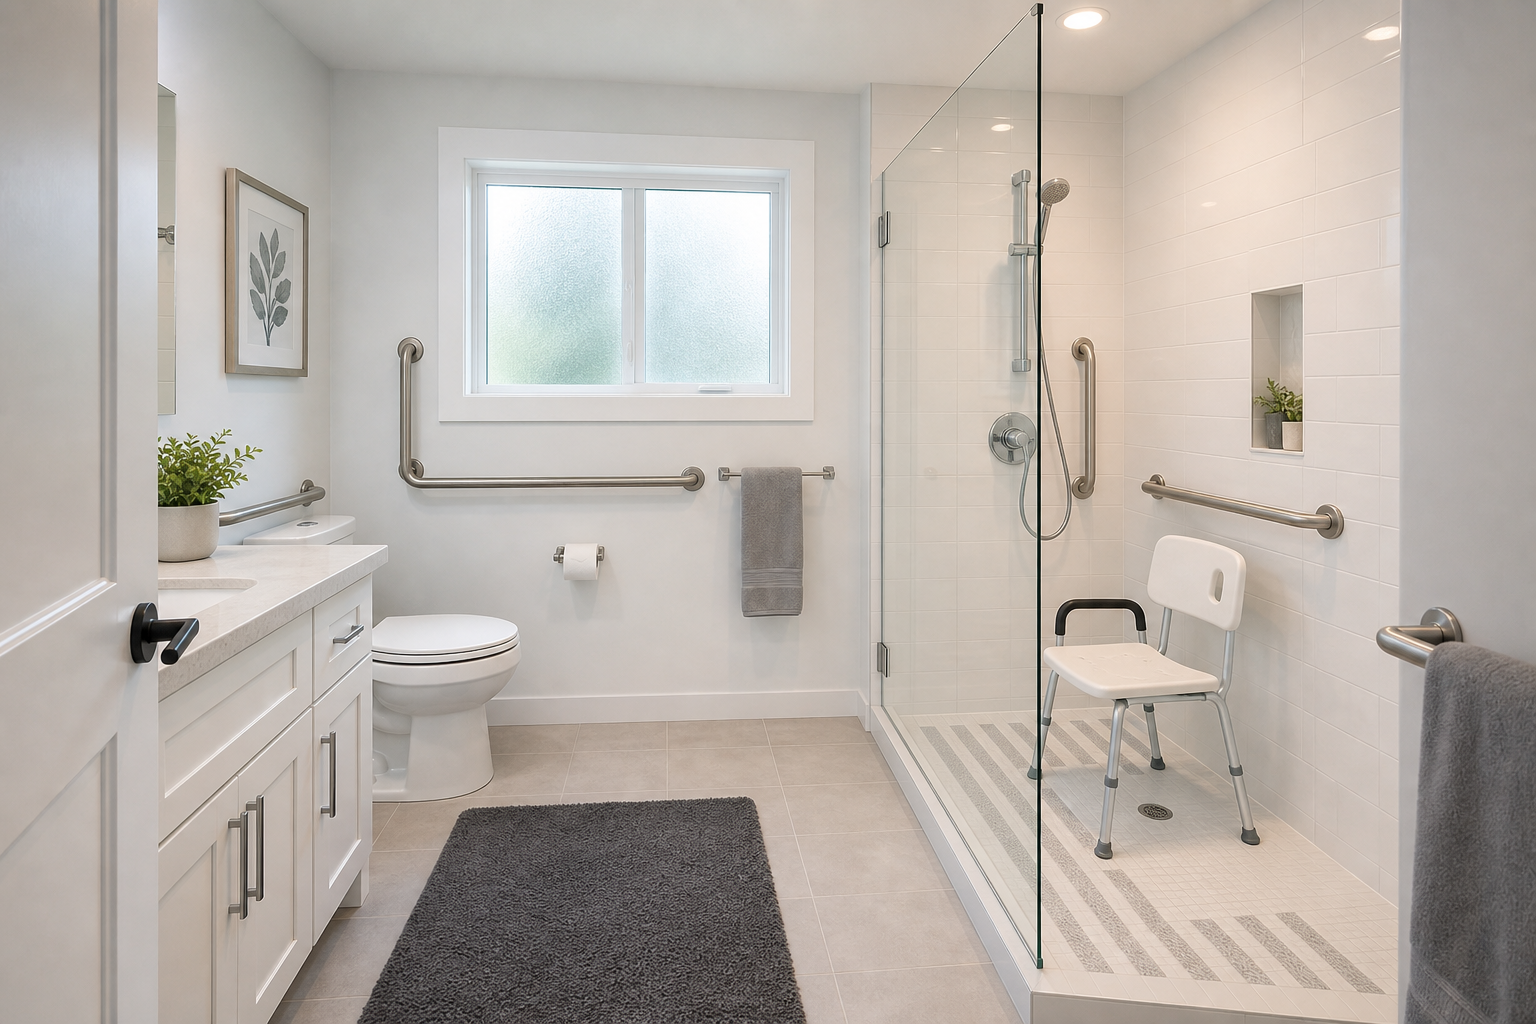
The bathroom is the most dangerous room for seniors. Wet surfaces, hard fixtures, confined space, and frequent transitions between standing and sitting create compounding risks. Post-exercise bathroom visits carry amplified risk when you’re fatigued and potentially lightheaded.
Grab Bars Beside the Toilet
A bar on the wall beside the toilet (horizontal, at seated shoulder height) provides support for sitting and standing. Position the bar 6-8 inches forward of the toilet back and at a height that lets you grip it comfortably while seated. This placement lets you push down and slightly forward as you rise, which is the natural body mechanics for standing from a toilet.
A swing-down grab bar or toilet safety frame that mounts around the toilet is an alternative if wall mounting isn’t possible. Frames work well in rentals or homes where you can’t modify walls. They’re slightly less stable than wall-mounted bars but far better than no support at all.
Grab Bars in the Shower
One vertical bar at the shower entry (for stepping in and out) and one horizontal bar at chest height (for stability during bathing). The entry bar should be on the outside wall, positioned where you naturally reach when stepping over the tub edge or shower threshold. The horizontal bar inside provides support while you wash, especially when lifting one leg to clean your feet.
Suction-cup grab bars are temporary alternatives but less reliable than screw-mounted bars. If you use suction bars, test them daily before putting weight on them. Press the suction cup firmly, activate the lock mechanism, then pull with significant force to confirm adhesion. Suction bars work on smooth tile but fail on textured surfaces.
Non-Slip Bath Mat
Inside the shower or tub and on the bathroom floor immediately outside. Replace these mats every six months. Even high-quality non-slip surfaces degrade with exposure to soap, shampoo, and hot water. When the surface feels slightly slick under wet feet, it’s time to replace the mat.
Raised Toilet Seat
A raised toilet seat with armrests reduces the depth of the squat needed to sit and provides handles for safe lowering and rising. Standard toilet height is 15-16 inches. A raised seat adds 3-5 inches, bringing the seated height closer to a standard chair. This modification is especially valuable after hip or knee replacement surgery, but many people find it helpful for everyday use even without recent surgery.
Look for models with armrests that lock securely in place. Some cheaper models have arms that rotate or feel flimsy under pressure. The armrests should support your full weight as you lower and rise.
Medium Priority: Hallways and Stairs
Hallway Grab Bar
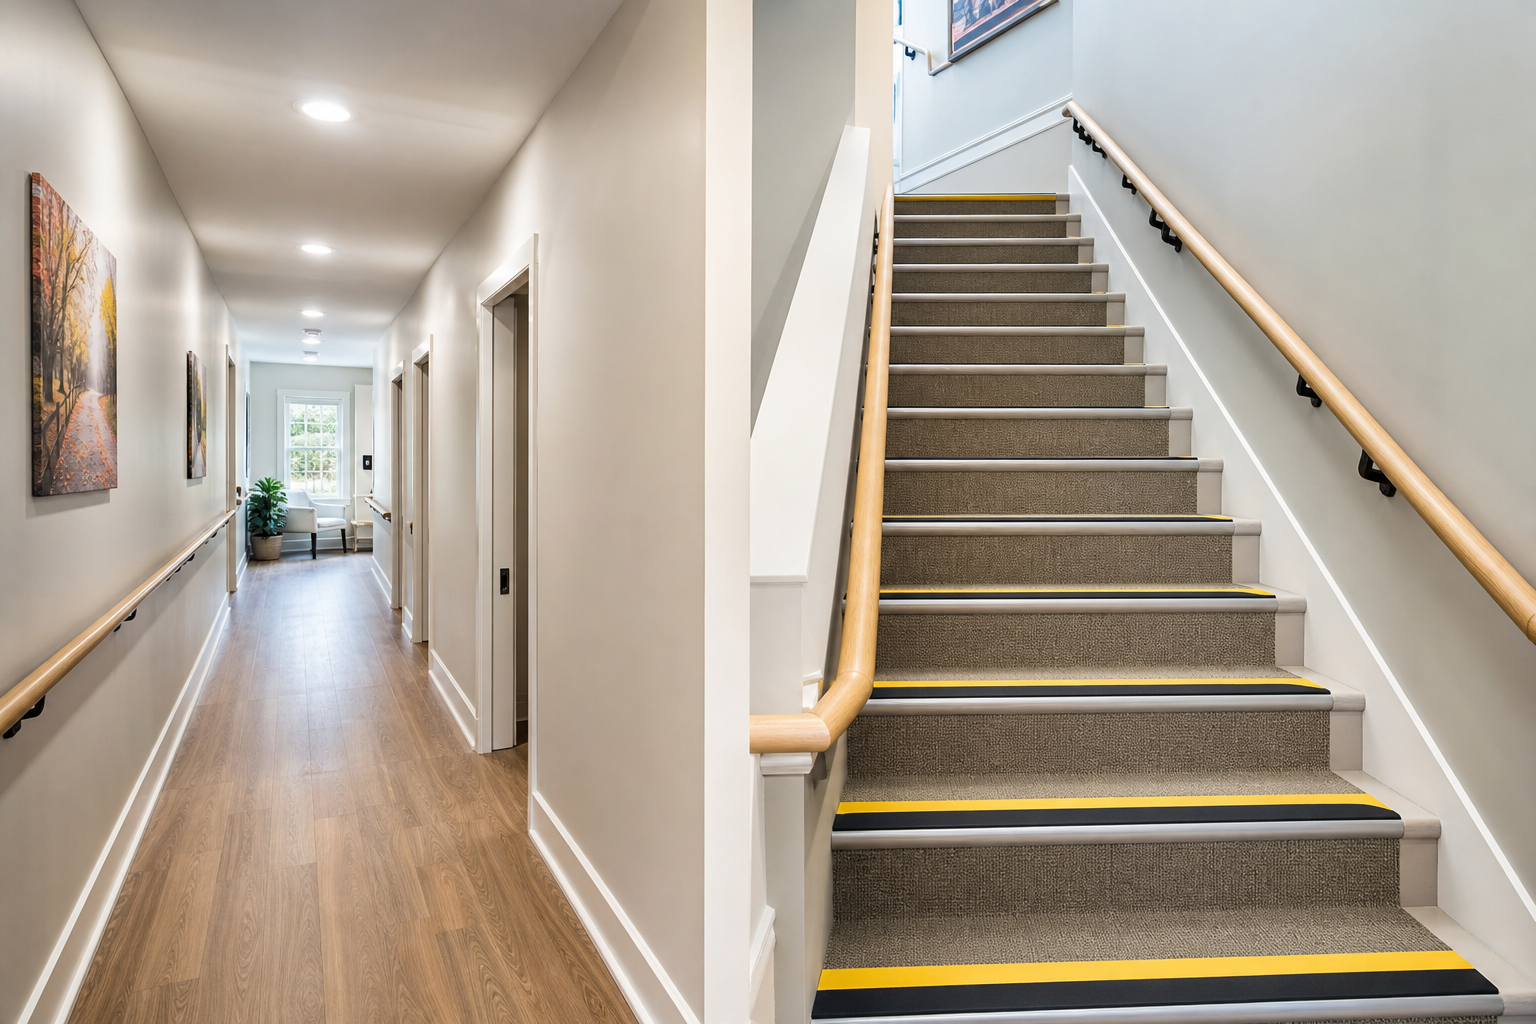
If your hallway is narrow and serves as a walking path (including indoor walking exercise routes), a wall-mounted grab bar along one wall provides continuous hand support. This works best in hallways 36-42 inches wide where you can comfortably reach the bar while walking normally. In wider hallways, a bar feels too far away to be useful.
Install hallway bars at 34-38 inches high, measured from the floor to the top of the bar. This is slightly lower than the standard 42-inch handrail height because you’re not gripping it from above like a stair rail. You’re reaching sideways for balance support.
Stair Handrails
Both sides of every stairway should have a secure, continuous handrail. If only one side has a rail, install a second. Round or oval handrails (1.25-1.5 inch diameter) are easiest to grip. Rails that are too thin or too thick force your hand into an awkward position that reduces grip strength.
Continuous means the rail runs the full length of the stairs without interruption. Rails that stop short at the top or bottom stair eliminate support exactly where you need it most during the transition between level floor and stairs. If your current rail has a decorative newel post that creates a gap, extend the rail or add a short return section to fill that gap.
Rails should be installed 30-34 inches above the stair nosing (the front edge of each step). Test your existing rails by gripping firmly and pulling sideways and down. Any movement means the rail isn’t adequately secured and needs reinforcement. For those interested in incorporating stairs into their fitness routine, learn about safe stair stepper machines and proper technique.
Non-Slip Stair Treads
Adhesive non-slip treads on each stair step prevent slipping, especially on hardwood or carpeted stairs with worn tread. Install treads on every step, not just the top or bottom few. Falls happen anywhere on the staircase.
Clean the stair surface thoroughly with rubbing alcohol before applying adhesive treads. Dust and oils prevent proper adhesion. Press treads firmly and let them cure for 24 hours before using the stairs. Mark the stairs with caution tape during the curing period so other household members don’t use them before the adhesive sets.
On carpeted stairs, look for treads designed specifically for carpet. Standard treads for hard surfaces don’t adhere properly to carpet fibers.
Motion-Activated Night Lights
In hallways, bathrooms, and bedrooms for nighttime navigation. Position lights low on the wall (6-12 inches above the floor) so they illuminate the path without shining directly into your eyes when you’re walking. Plug-in models work in most locations. Battery-powered stick-on lights work where outlets aren’t available.
Set the sensitivity so lights activate from 6-8 feet away. This gives you illumination before you enter the dark space. Lights that activate only when you’re already in the room don’t help with the transition from lighted to dark areas.
Medium Priority: General Living Areas
Remove All Loose Rugs
Every loose rug is a tripping hazard. This is non-negotiable for safe exercise at home. Small accent rugs, bathroom rugs not secured with non-slip backing, and decorative runners all need to go. If you must keep a rug, secure it with non-slip rug tape on all edges. Test secured rugs weekly by trying to kick up a corner with your foot. If the corner lifts, reapply tape.
Many people resist removing rugs because they like the look or warmth. Consider alternatives: wall-to-wall carpeting in high-traffic areas, or larger area rugs that cover most of the room and are heavy enough to stay flat. Tiny accent rugs provide minimal benefit and maximum risk.
Secure Electrical Cords
Tape cords to baseboards or run them behind furniture so they never cross walkways. Use cord clips or cable raceways to keep cords flat against walls. If a cord must cross a walkway temporarily, cover it with a cord protector ramp (the rubber or plastic channels that create a smooth transition). Never run cords under rugs. This creates a fire hazard and makes the rug more likely to shift.
Consolidate devices that need charging. Set up a charging station on a counter or table where multiple devices charge in one location. This reduces the number of cords running across your living space.
Rearrange Furniture
Create 36-inch-wide pathways between rooms and to frequently used areas. Measure your actual pathways with a tape measure. What looks like adequate space often measures only 28-30 inches. You need 36 inches minimum to walk comfortably without turning sideways or brushing against furniture.
Common problem areas: the path from the bedroom to the bathroom, the route from the kitchen to the living room, and the space between a chair and the
