The bathroom is the most dangerous room in the house for adults over 60. Wet surfaces, small spaces, and the combination of standing on one leg while stepping in and out of a shower create a perfect storm for falls. Installing grab bars is one of the highest-impact fall prevention measures you can take, and modern options look nothing like the institutional chrome rails of hospitals past.
Before making any changes to your bathroom setup, talk with your doctor or physical therapist. They can assess your specific balance, strength, and mobility needs and recommend the most appropriate safety features for your situation.
Suction-Mounted vs. Wall-Mounted Grab Bars
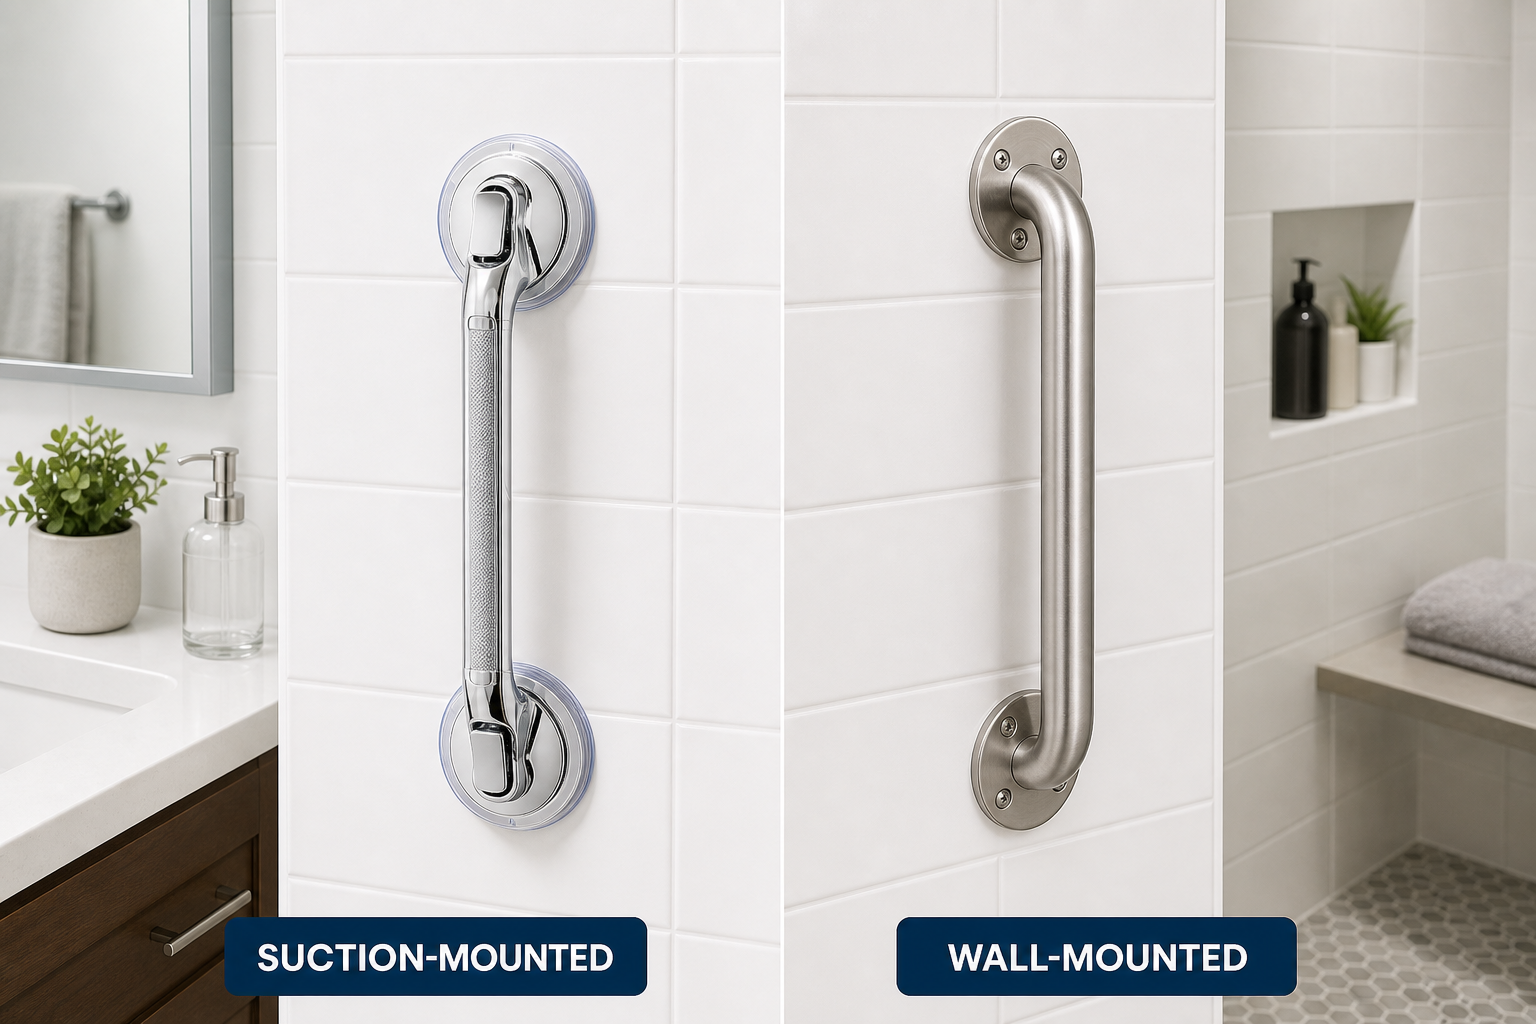
Suction-Mounted Bars
Suction grab bars attach to smooth, non-porous surfaces (like tile, glass, or acrylic) using vacuum cups. They require no drilling, no tools, and no permanent modifications, making them ideal for renters. The best suction bars feature indicator tabs that show whether the seal is secure (green means locked, red means reattach).
Limitations: Suction bars should be treated as balance aids, not full weight-bearing supports. Most are rated for 250-300 pounds of momentary force, not the sustained pull of someone actively falling. They don’t work on textured tile, grout lines, or porous surfaces. Check the suction daily before use. Press down firmly on each suction cup and tug gently to confirm the seal before putting any weight on the bar.
The quality of your wall surface determines whether suction bars are viable. Small imperfections you can’t see or feel, like minor tile texture or microscopic grout residue, can compromise the seal. Clean the mounting area with rubbing alcohol before each attachment. Oils from soap, shampoo, or body wash break down suction over time.

Vive Suction Grab Bar
Popular choice with strong vacuum cups and color-coded safety indicator for peace of mind
Suction bars work best for people who need light support to steady themselves while shampooing or rinsing, not for those who need to bear significant weight. If you’ve already experienced a fall, or if you have significant balance issues similar to those that require careful mobility aid selection, skip suction models entirely and go straight to wall-mounted options.
Wall-Mounted Bars
Wall-mounted grab bars screw directly into wall studs (or into blocking installed behind the wall). They’re dramatically stronger than suction models, typically rated for 500+ pounds. These are the recommended option for anyone who needs full weight-bearing support, has a history of falls, or wants permanent safety infrastructure.
Installation: Mounting into wall studs is essential. Bars screwed only into drywall will pull out under load. Standard 16-inch stud spacing means the studs won’t always line up exactly where you need support. If studs aren’t in the right location, a contractor can install wood blocking behind the drywall in about an hour. This involves cutting the drywall, securing horizontal wood pieces between studs, and patching the wall before mounting the bar.
Many home modification programs and some insurance plans cover the cost for fall-risk seniors. Area Agencies on Aging often keep lists of contractors experienced in accessibility modifications.

Moen Home Care Grab Bars
Professional-grade strength with modern stainless steel finish that blends with contemporary bathrooms
Wall-mounted bars feel completely solid when installed correctly. There’s no flex, no give. That stability makes an enormous difference psychologically. When you know the bar can handle your full weight without question, you’ll actually use it instead of trying to tough it out or grab the shower door frame.
Fold-Down Shower Seats
A fold-down shower seat mounts to the wall and flips up when not in use, saving floor space in smaller showers. These are invaluable for seniors who fatigue during showers, have balance issues, or need to sit while washing their lower body. Look for seats rated for at least 300 pounds with non-slip surfaces and stainless steel mounting hardware.
Sitting during showers isn’t a sign of weakness. It’s smart energy management. Conserving your energy and balance during personal care means you have more reserves for activities you actually want to do later in the day.

Teak Fold-Down Shower Seats
Popular upgrade over plastic models with natural water resistance and warm, non-slip surface
Install the seat at a height that lets you sit and stand without excessive knee strain. For most people, that’s 17-19 inches from the shower floor. Test the height before drilling if possible. Sitting on a sturdy box or step stool at different heights can help you find your optimal range.
Pair a shower seat with a handheld showerhead on a sliding bar mount. This combination lets you sit comfortably while still reaching all areas. You’re not contorting your body or struggling to stay under a fixed showerhead.
Optimal Placement Guidelines
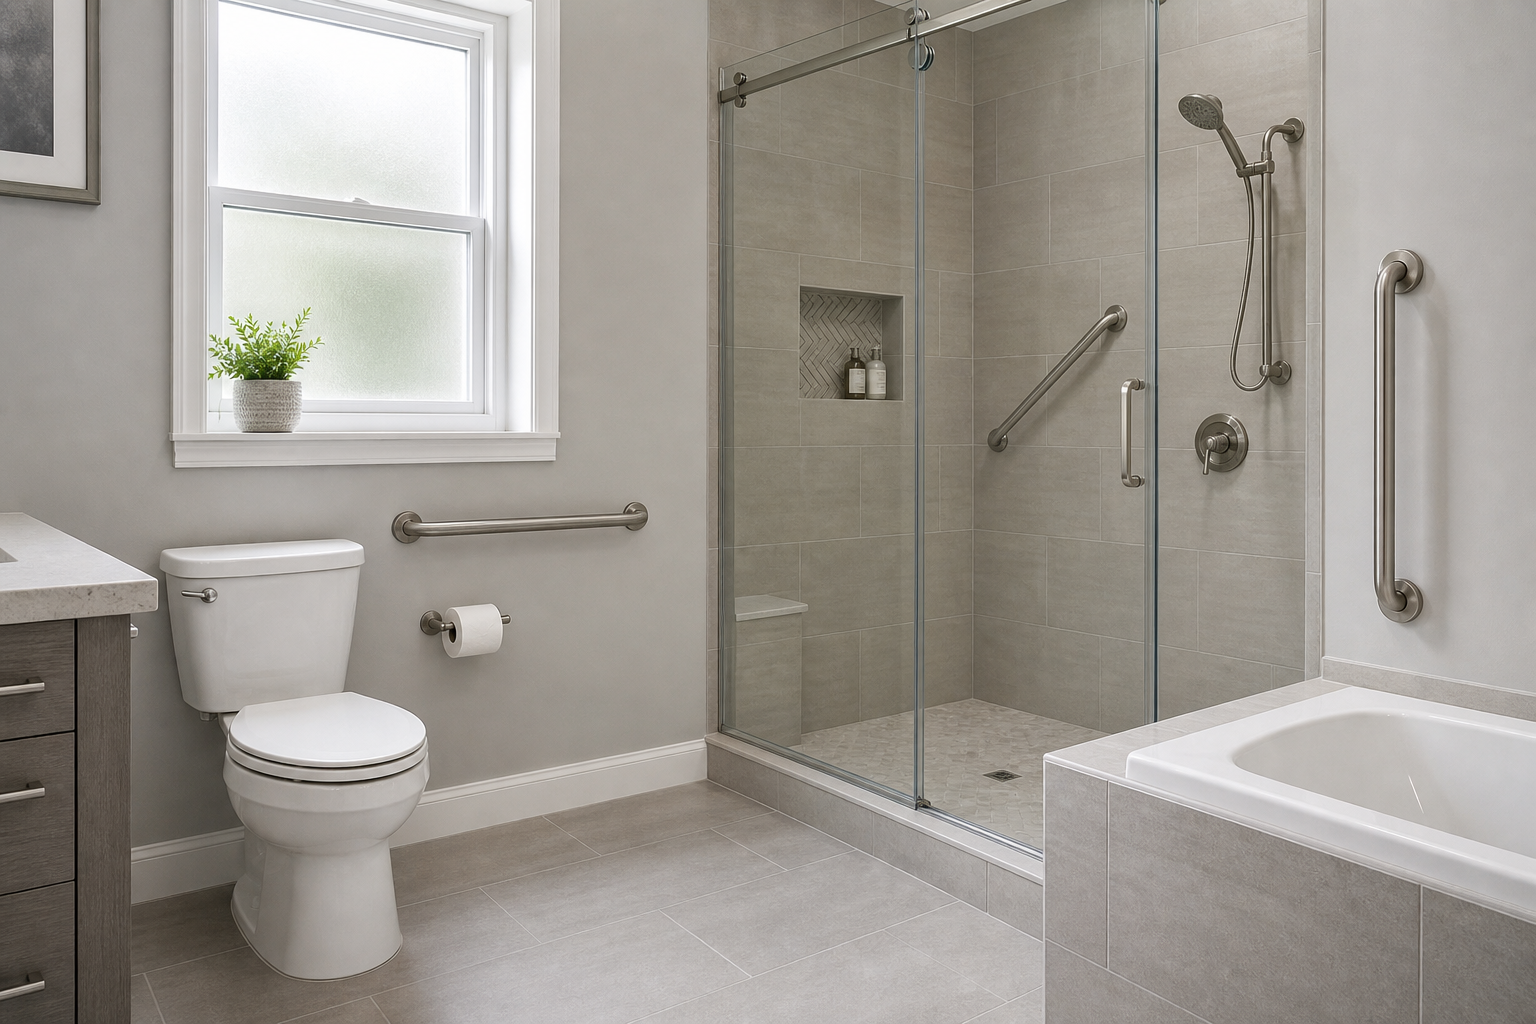
Where you install grab bars matters as much as which bars you buy. These placement recommendations follow ADA accessibility guidelines adapted for residential use:
- Shower entry: A vertical bar (18-24 inches) mounted on the wall next to the shower opening, at shoulder height. This gives you something to hold while stepping over the threshold. The vertical orientation lets you grip at whatever height feels natural without adjusting your stance.
- Inside the shower (long wall): A horizontal bar (24-36 inches) mounted at about 33-36 inches from the floor. This provides support during standing and can help you sit on a shower seat. The horizontal bar works for multiple tasks: steadying yourself while washing, pulling yourself up from a seated position, or catching yourself if you slip.
- Shower controls area: A vertical or angled bar near the faucet, so you can hold on while reaching for the controls. Turning knobs or adjusting water temperature requires fine motor control that’s harder to manage when you’re also balancing on wet tile.
- Next to the toilet: A horizontal bar on the side wall, 33-36 inches from the floor. This assists with sitting down and standing up, which is a common fall point for seniors. The controlled lowering motion when sitting puts significant stress on your knees and core. A grab bar takes some of that load.
- Bathtub entry: If you have a tub/shower combo, mount a bar on the wall at the entry point to assist with stepping over the tub wall. Tub walls are typically 14-16 inches high. Lifting your leg that high while balancing on the other leg is an enormous fall risk. A vertical bar at the entry point lets you hold on with both hands while stepping over.
Consider your personal movement patterns. If you always enter the shower with your right foot first, the bar placement that helps someone who leads with their left foot won’t work as well for you. Occupational therapists who specialize in home modifications can observe your bathroom routine and suggest placement that matches your actual habits.
Mark the proposed bar locations with painter’s tape before drilling. Live with the tape for a few days. Reach for the marked spots during your normal routine. You’ll quickly discover if the placement needs adjustment before committing to permanent installation.
Materials Comparison
- Stainless steel: The most durable and hygienic option. Resists rust and bacteria. Available in brushed or polished finishes. Slightly cold to the touch initially. Grade 304 stainless (the standard for bathroom fixtures) holds up in humid environments indefinitely. The smooth surface wipes clean easily and doesn’t harbor bacteria in texture or crevices.
- Chrome-plated: Less expensive than solid stainless but can chip or peel over time, especially in humid environments. Fine for lighter-use situations. Once the chrome coating breaks, the underlying metal (usually brass or steel) can rust. That creates sharp edges and weak points.
- Matte/powder-coated: Provides a warmer feel and better grip than bare metal. Available in designer colors (bronze, black, white) that blend with modern bathroom fixtures. More prone to scratching over time. The coating can wear down at high-contact points, exposing the base metal.
- Textured surfaces: Some bars include peened (dimpled) or knurled grip surfaces for better hold with wet hands. These are especially important for seniors with grip weakness. The texture interrupts the water film that makes smooth metal slippery. Arthritis, neuropathy, or general age-related grip decline all make textured bars worth considering.
Bar diameter affects how securely you can grip. Most grab bars are 1.25 to 1.5 inches in diameter. The smaller diameter (1.25 inches) works better if you have small hands or limited grip strength, similar to exercises designed to improve hand function. You can wrap your fingers further around the bar. Larger diameters (1.5 inches) distribute pressure more evenly across your palm, which some people find more comfortable during prolonged gripping.
Common Installation Mistakes
Mounting too low: Many people install bars at waist height because that’s comfortable to reach while standing. But when you’re losing your balance or recovering from a slip, you need the bar at a height where you can brace yourself without bending down. 33-36 inches from the floor is the tested standard for good reason.
Using toggle bolts or drywall anchors: These fasteners are not sufficient for grab bars. Period. They’re rated for hanging pictures or lightweight shelves, not for supporting human body weight during a fall. Wall studs or properly installed blocking only.
Assuming all studs are usable: Sometimes a stud has electrical wiring or plumbing running through it. A professional installer uses a multi-function stud finder that detects wires and pipes, not just wood. Hitting a water pipe or electrical line while drilling is a whole different kind of bathroom emergency.
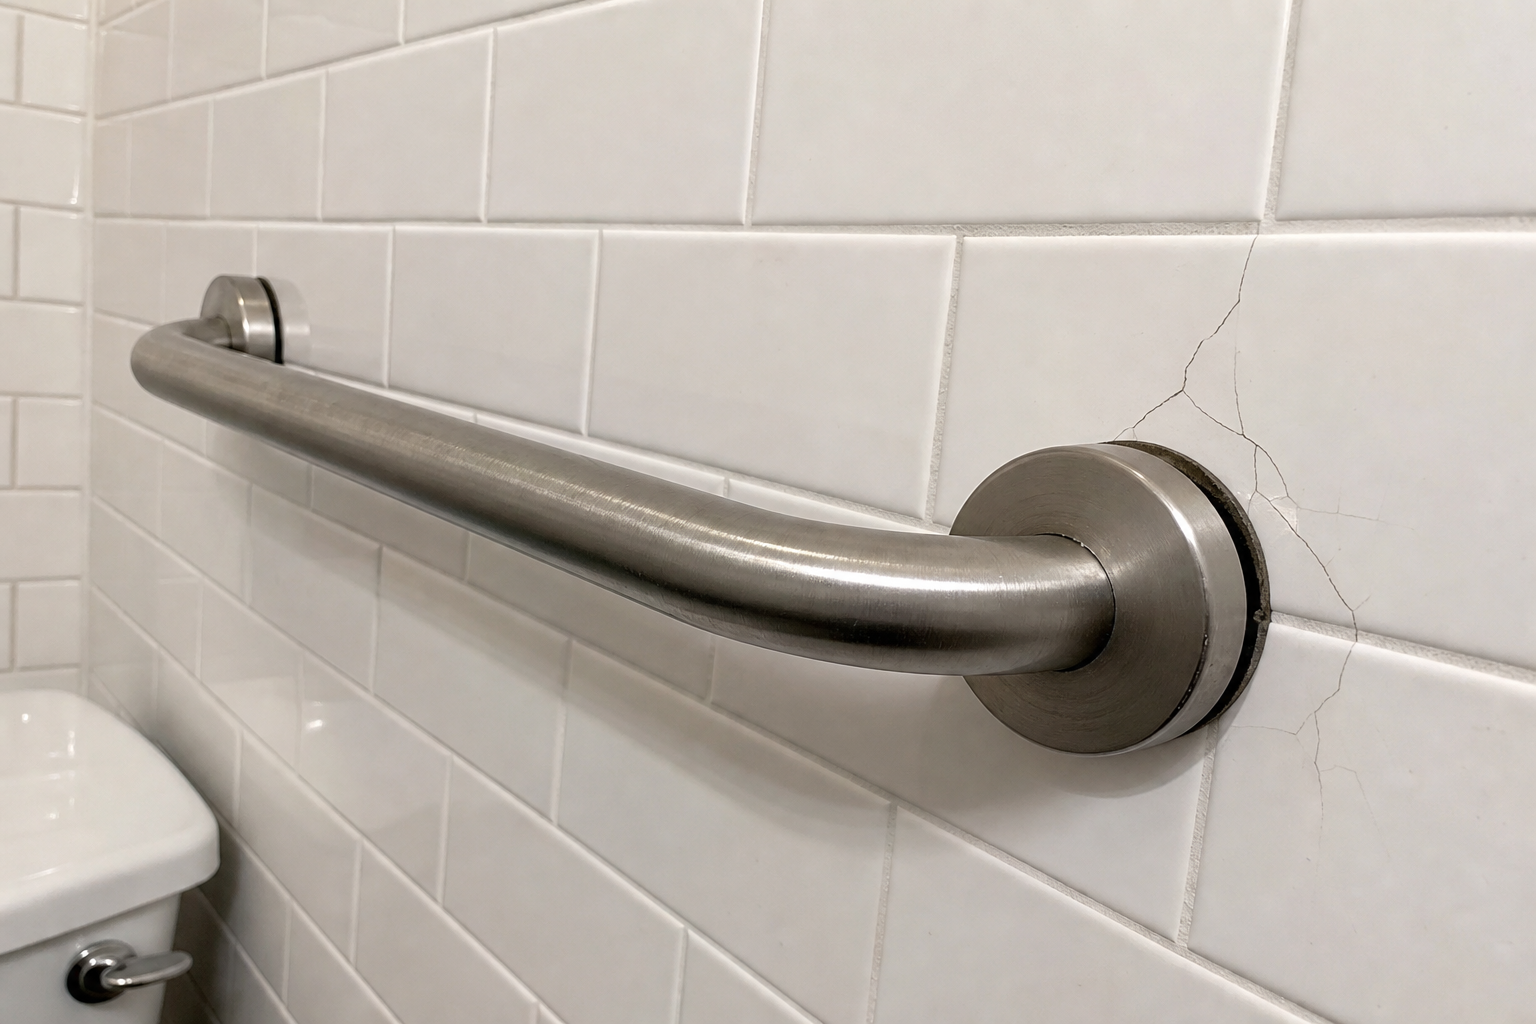
Over-tightening screws: You want the bar secure, but cranking down too hard can crack tile or strip the screw threads in wood. Tighten until snug, then stop. The bar shouldn’t wiggle, but you shouldn’t be white-knuckling the drill either.
Material Cost and Labor Expectations
A quality wall-mounted grab bar typically ranges in price depending on length and finish, but you can find good options on Amazon at various price points. Suction bars are generally more budget-friendly. Fold-down shower seats vary in price based on materials and weight capacity. Installation costs vary regionally, but expect a reasonable fee per bar for professional mounting into studs. If blocking needs to be added behind the wall first, there will be additional costs for the drywall work.
Some contractors offer package deals. Installing three or four bars during one visit costs less per bar than calling them out separately for each one.
Frequently Asked Questions
Can I install grab bars myself?
If you’re comfortable using a drill and stud finder, wall-mounted bars are a manageable DIY project. The critical step is hitting wall studs with every screw. Suction bars require no tools at all. If you’re unsure, many handyman services install grab bars for a modest fee, and some local aging-in-place programs offer free installation for qualifying seniors.
The physical drilling isn’t hard. The challenging part is ensuring you’ve correctly located studs and that your bars are level and at the right height. If you’ve never worked with tile before, practice your technique somewhere less visible before drilling your shower wall.
Will grab bars damage my tile?
Wall-mounted bars require drilling through tile, which is permanent. A masonry bit and gentle pressure prevent cracking. Suction bars leave no damage at all. If you’re concerned about tile damage, consult a professional installer who has experience with tile walls.
Drill slowly through tile. Let the bit do the work. Pushing hard causes the tile to crack. Once through the tile and into the wall behind, you can drill at normal speed. Sealing the screw holes with silicone caulk prevents water from getting behind the tile.
Can a towel bar work as a grab bar?
Never. Towel bars are designed to hold the weight of towels (a few pounds) and are mounted with small screws into drywall anchors. They will rip out of the wall instantly if you put your body weight on them. This is one of the most dangerous bathroom misconceptions. Only use products specifically rated and mounted as grab bars for support.
People grab towel bars instinctively during a slip because they’re there and they look sturdy. The bar pulls out of the wall. You fall anyway, now with sharp tile and metal hardware coming down with you. Don’t create that hazard.
Are grab bars covered by insurance?
Medicare does not typically cover grab bar installation, but some Medicare Advantage plans and Medicaid waiver programs do. Check with your specific plan. Many Area Agencies on Aging offer home modification assistance, and some states have fall prevention programs that provide free grab bar installation for qualifying seniors.
Veterans can check with their local VA for home modification benefits. Some long-term care insurance policies cover bathroom safety equipment. It’s worth making the calls. Free or subsidized installation programs exist, but you have to ask.
How often should I check the bars?
For wall-mounted bars, give them a firm tug once a month to confirm they’re still solidly attached. Screws can work loose over time, especially in damp environments. Tighten any that feel slightly loose before they become a problem.
For suction bars, check them before every use. The vacuum seal can break from temperature changes, humidity, or invisible surface contamination. A daily check takes five seconds and prevents a fall.
What if my shower has glass walls?
Tempered glass shower walls can support suction grab bars if the glass is thick enough (usually 3/8 inch or thicker). Check with the shower manufacturer. Glass-mounted bars need to be positioned away from door hinges and hardware to avoid stress points.
For wall-mounted bars, you’ll need to anchor into the studs behind the tile walls adjacent to the glass panels. Most glass showers have at least one tile wall where bars can be mounted permanently.
Should I install bars before I need them?
Yes. Waiting until after a fall to install safety equipment is backward. Falls happen suddenly. Balance declines gradually until it doesn’t. Installing bars while you’re still steady means they’re in place during that transition period when you’re noticing you’re not as sure-footed as you were, but you haven’t fallen yet.
Prevention is always easier than recovery. Grab bars installed before you absolutely need them give you years of cumulative fall risk reduction. This is especially important for those recovering from surgery, as detailed in our post-hip replacement exercise guide and post-knee replacement exercises. And if family or friends visit who have mobility limitations, your bathroom is already safe for them.
This article contains affiliate links. We may earn a small commission at no extra cost to you.
