Yoga was designed for flexible young bodies that can sit cross-legged on the floor, balance on one foot, and fold forward until their palms touch the ground. Your body at 65 or 75 doesn’t need to do any of those things to benefit from yoga.
Adaptive equipment bridges the gap between what traditional poses require and what your body can currently do, making yoga accessible, comfortable, and effective for seniors with stiff joints, limited range of motion, balance concerns, or inability to get on the floor.
The right props don’t water down your practice. They make it sustainable. A yoga pose that causes pain or feels unstable won’t build strength or flexibility because you’ll compensate with tension elsewhere in your body. Props let you stay in proper alignment long enough for the pose to work, which is how you actually get results.
Essential Adaptive Yoga Equipment
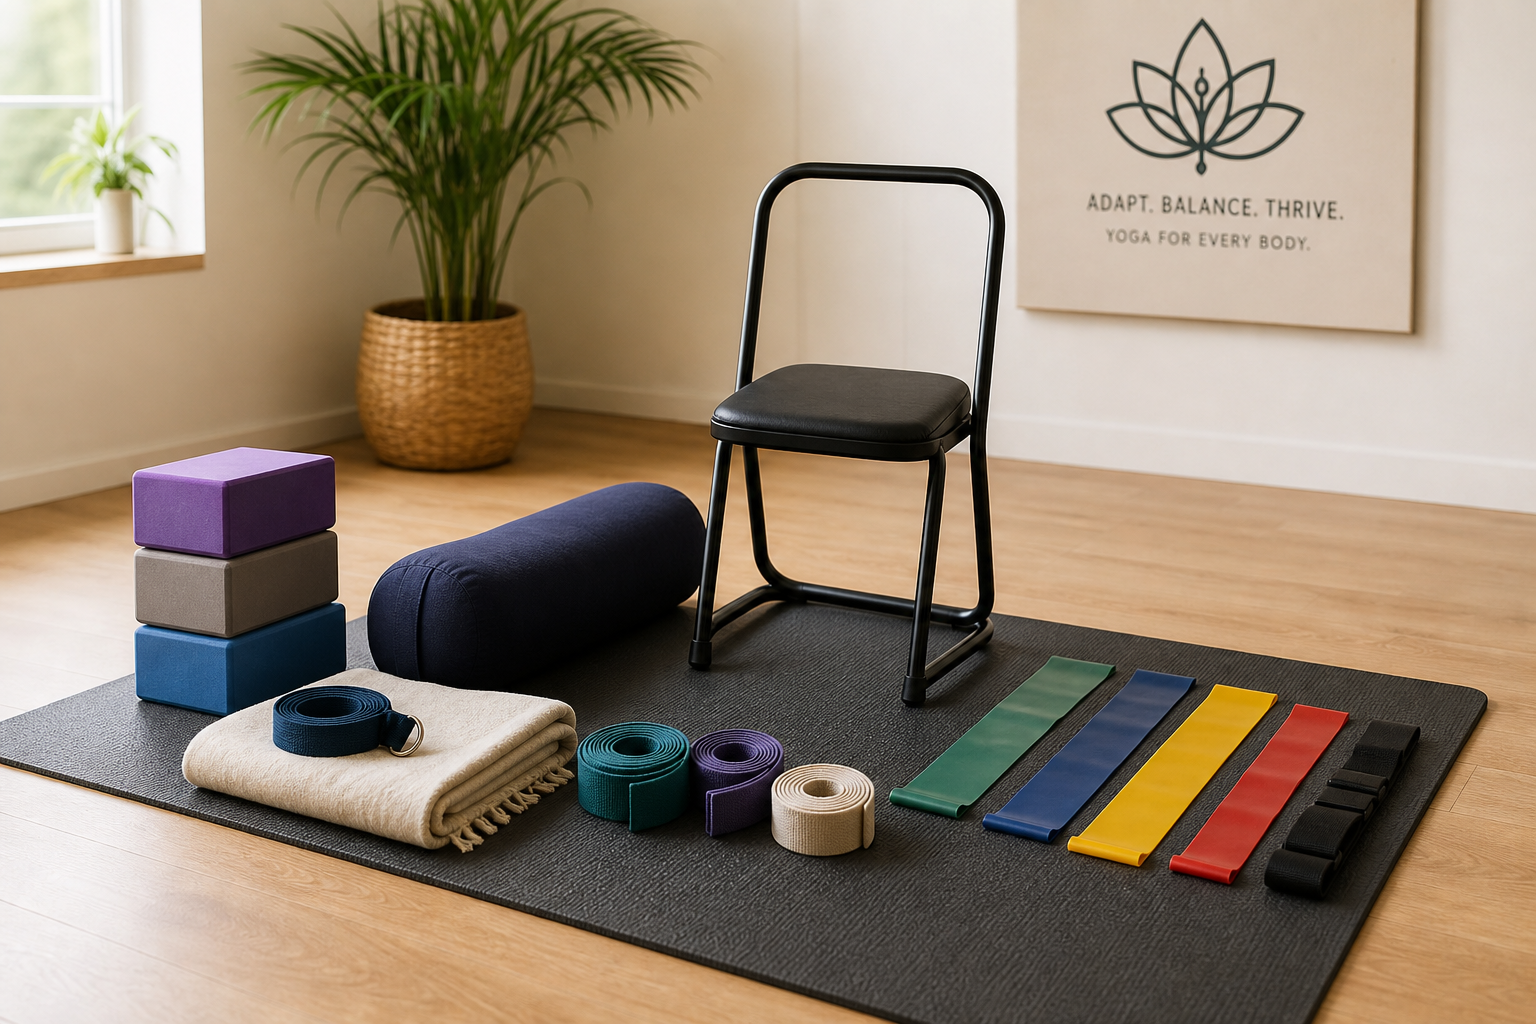
Yoga Chair
A sturdy, armless chair replaces the floor for virtually every yoga pose. Seated versions of forward folds, twists, hip openers, and even warrior poses provide the same muscle engagement and flexibility benefits as their floor counterparts.
Chair yoga eliminates the need to get down and up from the floor, removes most balance risk, and makes yoga accessible to wheelchair users and seniors with severe mobility limitations. Any standard dining chair works.
The chair needs a flat seat without cushions that compress unpredictably. Arms interfere with side bends and twists. Height matters: your feet should rest flat on the floor with knees at a 90-degree angle.
If the chair is too tall, place yoga blocks or thick books under your feet. Too short, and you’ll struggle to stand up between poses.
Kitchen and dining chairs work better than office chairs with wheels. You want stability, not mobility. The chair doesn’t move when you shift your weight.
Yoga Blocks (Set of Two)
Foam yoga blocks bring the floor closer to you. In standing forward fold, blocks under your hands raise the “floor” by 4-9 inches. In seated poses, a block under your sit bones elevates your hips, which reduces hamstring strain and allows a more upright spine.
In lying poses, a block under your head substitutes for the floor when lying flat is uncomfortable.

Foam Yoga Blocks Set of 2
Lightweight and forgiving with three height options for adjustable support
Buy two blocks because you’ll use them in pairs for many poses. Foam blocks are lighter and softer than cork or wood, making them more forgiving for senior use. Each block has three height options depending on which side you rest it on: approximately 3, 4, and 6 inches.
This adjustability lets you find the right height for your current flexibility rather than forcing yourself into a range your body isn’t ready for.
Blocks also work as spacers between your knees during certain lying poses, which can relieve hip or lower back discomfort. In bridge pose, squeezing a block between your thighs activates inner thigh muscles that might otherwise disengage.
Yoga Strap
A yoga strap extends your reach. If your hands can’t meet behind your back, a strap bridges the gap. If you can’t reach your feet in a seated forward fold, a strap around the balls of your feet lets you pull yourself into the stretch without rounding your back.
Straps are also used for shoulder stretches, hamstring stretches, and gentle traction on stiff joints. An 8-foot cotton strap with a D-ring buckle is the standard.
The D-ring lets you create adjustable loops, which is useful for holding positions without gripping tightly. Tight gripping creates unnecessary tension in your hands, wrists, and forearms that travels up into your shoulders and neck.
Cotton straps have enough texture to prevent slipping without being rough on your hands. Nylon straps slide more easily, which sounds convenient but actually makes it harder to maintain steady tension during a stretch.
Yoga Bolster
A rectangular bolster is a firm, oversized cushion that supports your body during restorative poses. Placed under your knees during savasana (final relaxation), it relieves lower back pressure.
Placed under your back during gentle chest openers, it allows passive stretching without muscular effort. In supported child’s pose, the bolster provides a surface to rest your torso on, reducing the hip and knee flexion the full pose requires.
Rectangular bolsters are more versatile than round ones for senior use. They don’t roll, and they provide a flatter surface for your torso during forward folds or your spine during backbends. Firmness matters here. A bolster that compresses too much under your weight won’t provide stable support.
Bolsters are particularly valuable if you have arthritis, chronic pain, or fatigue that makes active stretching difficult. Restorative poses held for several minutes with bolster support can release tension that won’t budge during shorter, more active stretches.
Thick Yoga Mat
Standard yoga mats (3-4mm) provide minimal cushioning for aging knees on hard floors. A 6-8mm thick mat cushions kneeling poses, protects the spine during lying poses, and makes floor-based yoga significantly more comfortable.
The trade-off is slightly less stability during standing poses because the thicker surface compresses underfoot, which is manageable when you use a wall or chair for support.
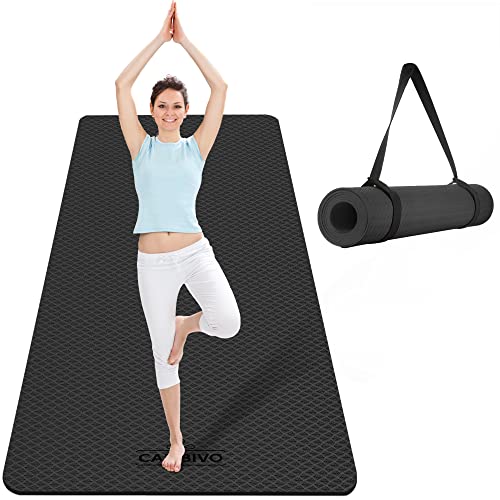
Extra Thick Yoga Mat 6-8mm
Essential cushioning for kneeling and lying poses with non-slip surface on both sides
Look for mats labeled “non-slip” on both sides. The bottom surface needs to grip the floor so the mat doesn’t slide during poses. The top surface needs texture that prevents your hands and feet from slipping, especially as you sweat.
Length is worth considering if you’re tall. Standard mats run about 68 inches. If you’re over 6 feet, an extra-long mat (72-74 inches) prevents your head or feet from landing on bare floor during lying poses.
Closed-cell foam mats resist moisture better than open-cell, which matters for hygiene. They’re easier to wipe down after practice.
Yoga Blanket
A firm, woven yoga blanket serves as a hip elevator (folded under your sit bones during seated poses), a knee cushion (folded under knees during kneeling poses), a head rest (folded under your head during lying poses), and a warmth layer during the final relaxation when your body temperature drops.
A Mexican-style cotton yoga blanket folds neatly and provides better support than a fluffy household blanket.
The firmness is key. A soft blanket compresses unevenly and won’t hold its shape under your weight. Woven cotton blankets from yoga suppliers are designed to maintain a stable folded height. You can fold them into precise rectangles that function almost like a thin bolster.
Blankets are also useful for covering yourself during savasana. Your body temperature drops when you lie still for several minutes, and getting cold pulls your attention away from relaxation. Some people prefer eye pillows for blocking light, but a blanket corner draped over your eyes works if you don’t want to invest in another prop.
Wall
A blank wall section is the most underappreciated yoga prop. Legs-up-the-wall pose (viparita karani) is one of the most restorative poses in yoga and requires only a wall and a mat.
Standing poses become safer with a wall within arm’s reach. Wall-supported half forward folds provide a hamstring stretch without the balance challenge of a freestanding fold.
The wall should be clear of light switches, outlets, artwork, and heating vents. You want a smooth surface free of obstacles. Corner walls work well because you can use both surfaces for different poses.
Wall space adjacent to your mat setup means you can transition between floor poses and standing poses without moving your entire practice area. This reduces the number of times you need to stand up and sit down during a session.
How Props Modify Key Poses
Standing Poses
Mountain Pose: Stand near a wall with fingertips touching for balance reference. Blocks aren’t needed but a wall provides confidence. This pose looks simple but teaches you how to distribute weight evenly across both feet, which improves balance in daily life.
The wall removes the fear of tipping so you can focus on the weight distribution itself.
Forward Fold: Place blocks on the floor in front of you at whatever height lets you fold with a straight back. Or use a chair seat as your “floor.” If your hamstrings are tight, bending forward with straight legs rounds your spine, which misses the point of the stretch.
Blocks let you maintain a neutral spine while you work on hamstring length over time.
Warrior I and II: Use a chair back for hand support. Don’t go as deep into the lunge. Blocks under the back hand in side angle pose. These poses build leg strength, but the balance component can overshadow the strength work if you’re wobbling.
The chair removes the wobble so your muscles can actually engage.
Balance Poses
Tree Pose: One hand on a wall. Foot placed on the calf (not the knee) or toes touching the floor with heel against the ankle. Never place your foot directly on the knee joint. The calf or ankle are safe alternatives.
If your hip flexibility doesn’t allow even the ankle position, keep your toes on the floor and just lift the heel. You’re still building balance.
The wall contact can be light, just fingertips. As your balance improves over weeks of practice, try hovering your fingers a half-inch from the wall without actually touching. Your body learns to balance knowing the wall is there as backup.
Seated Poses
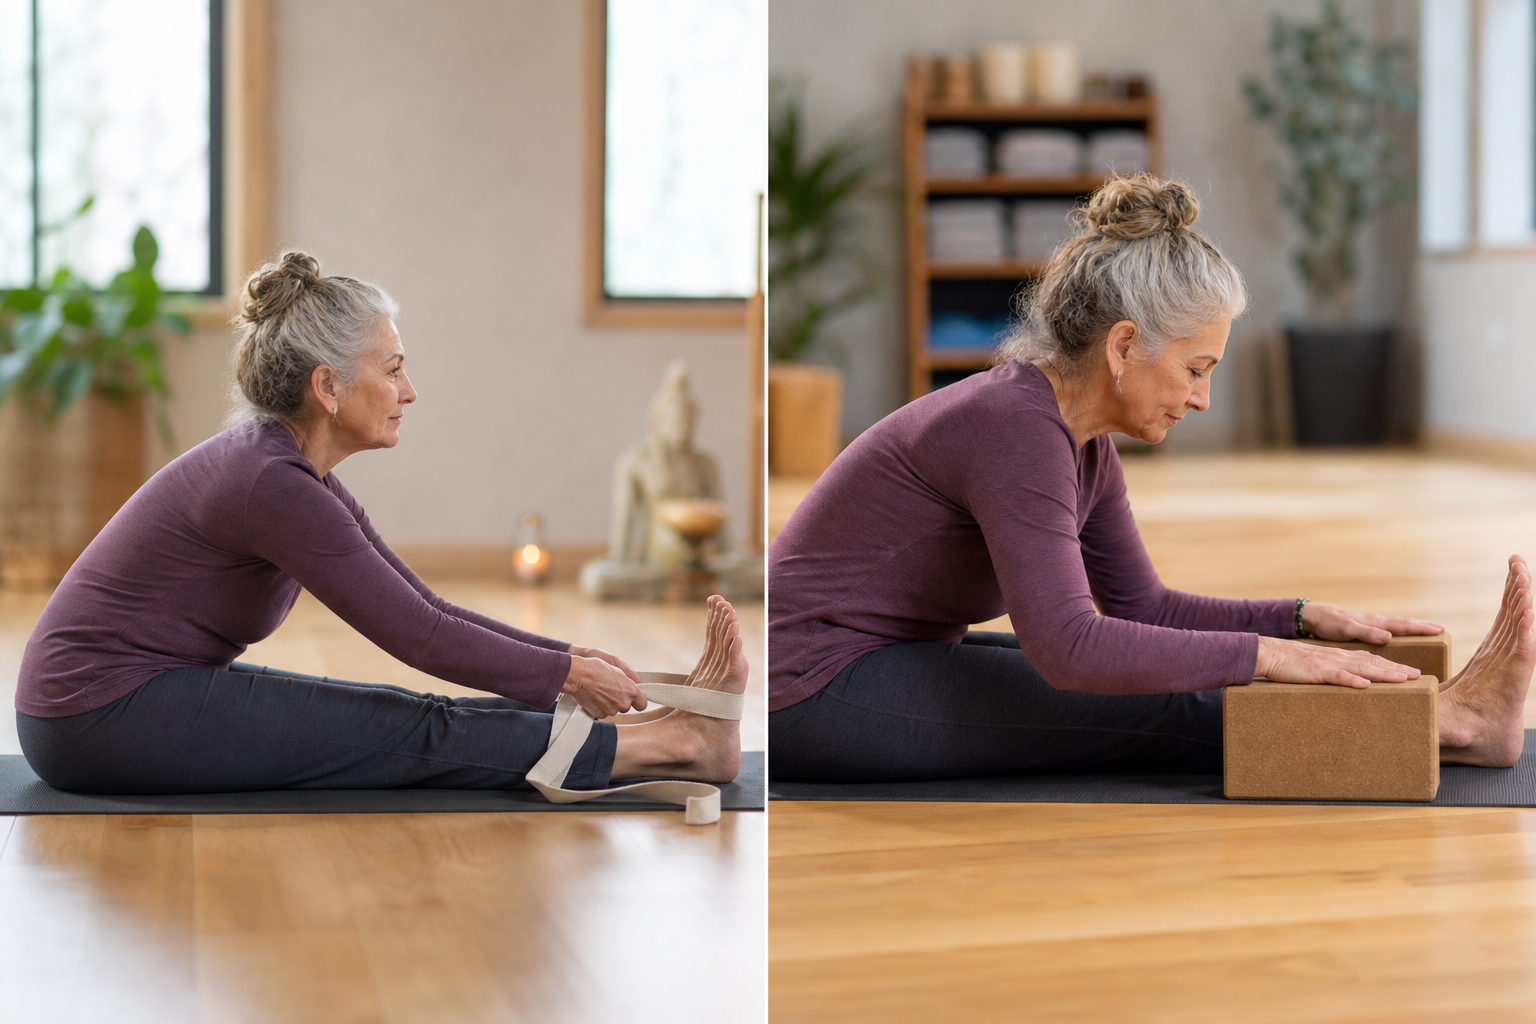
Seated Forward Fold: Sit on a folded blanket to elevate hips. Loop a strap around the balls of your feet and hold the strap ends. Pull gently on the strap to bring your torso forward, keeping your spine long.
The goal is not to touch your toes. It’s to feel a stretch along the back of your legs while maintaining length through your spine.
If you have tight hamstrings, your pelvis tilts backward when you try to fold forward, which rounds your lower back. The blanket under your sit bones tilts your pelvis slightly forward to start, which gives your hamstrings more room and protects your lower back.
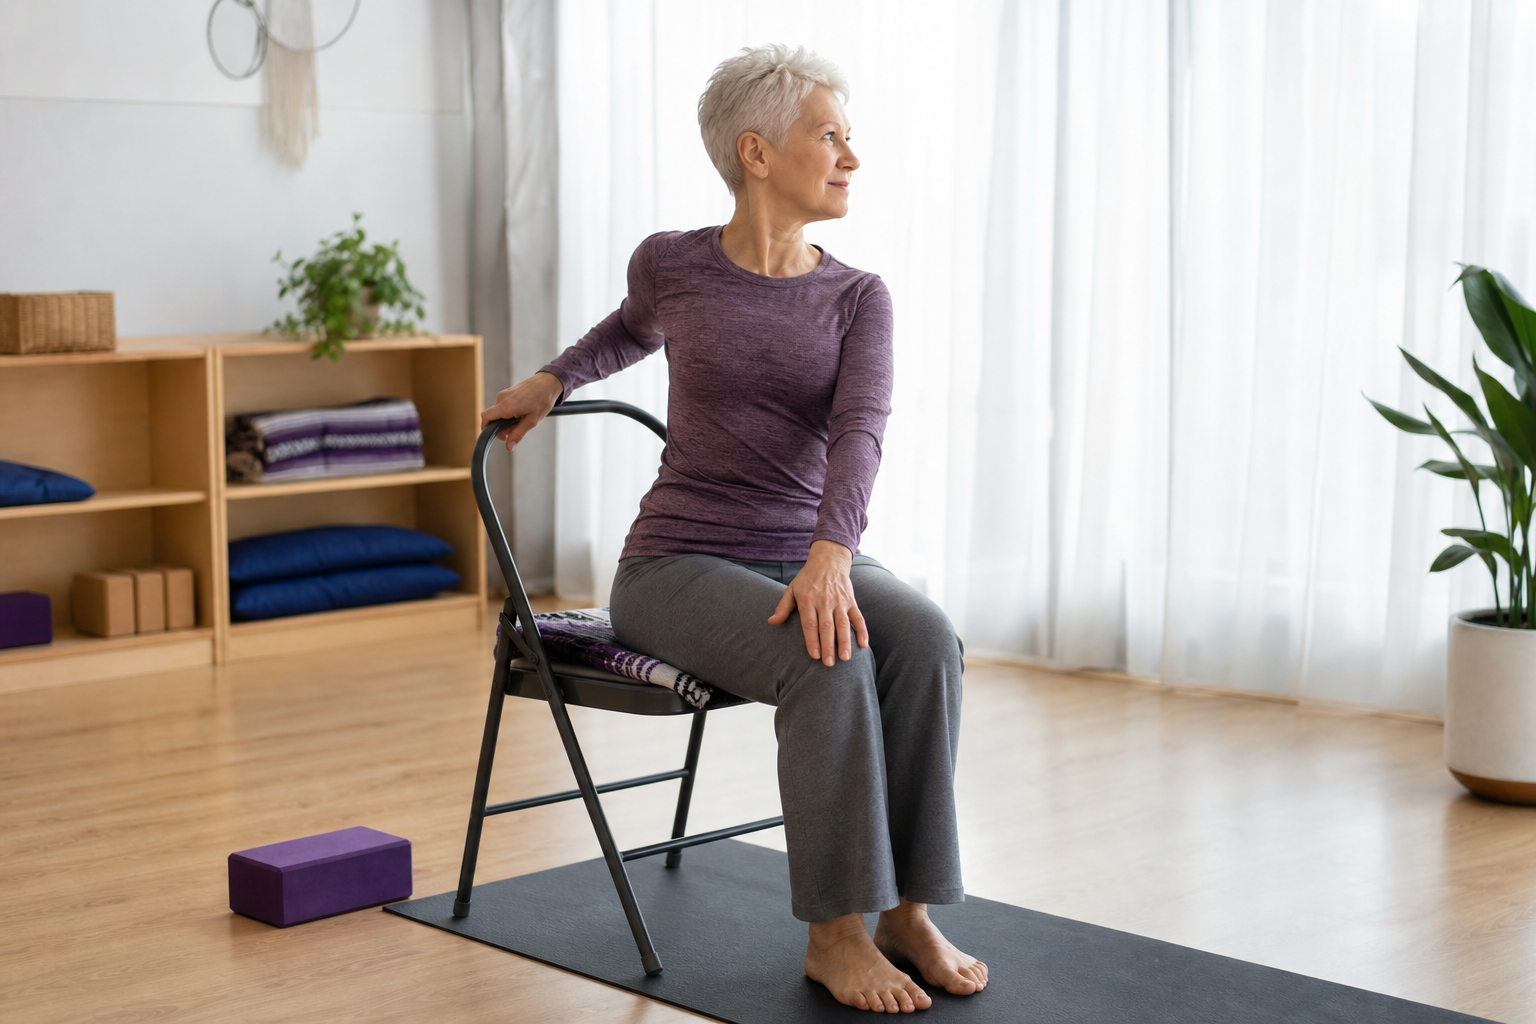
Seated Twist: Sit in a chair. Place your right hand on the outside of your left knee. Place your left hand on the chair back behind you. Twist gently to the left. The chair provides stability and a fixed point to twist against.
Twists improve spinal mobility and are thought to aid digestion.
Lying Poses
Bridge Pose: Lie on your back with knees bent and feet flat. Place a block between your thighs. Lift your hips, squeezing the block. This engages your inner thighs and takes some pressure off your lower back.
If lifting your hips is uncomfortable, place a block under your sacrum (the triangular bone at the base of your spine) and rest your weight on the block. This is a supported bridge, which is gentler.
Corpse Pose (Savasana): Bolster under knees. Blanket under head. Another blanket over your body for warmth. Eye pillow for light blocking. This final relaxation pose allows your nervous system to absorb the benefits of your practice.
Comfort is essential. If your lower back aches, the bolster under your knees reduces the arch. If your chin juts toward the ceiling when you lie flat, the blanket under your head brings your neck into neutral.
Common Modifications for Specific Conditions
Arthritis in Hands or Wrists
Use a folded blanket under your palms during poses that bear weight on your hands. The extra cushioning reduces joint compression. In downward-facing dog, which seniors often do at the wall rather than on the floor, make fists instead of placing flat palms.
This shifts weight off your wrist joints.
Straps reduce the need for tight gripping. Thread your hand through the loop rather than squeezing the strap in your fist.
Knee Pain or Replacement
Never kneel directly on a hard floor. Use a folded blanket, a thick mat, or double up your mat by folding it in half. Avoid deep knee flexion in poses like child’s pose unless your surgeon has cleared you for that range of motion.
Use a bolster under your torso in child’s pose to reduce how much you need to bend your knees.
In standing poses, don’t bend your front knee past 90 degrees. A smaller lunge is still effective for building leg strength. For detailed guidance after knee surgery, check out our post-knee replacement exercises guide.
Hip Stiffness or Replacement
Avoid crossing your legs. In seated twists, keep both feet on the floor. Don’t force external rotation of the hip (turning your thigh outward) in poses like pigeon or lotus. These poses aren’t necessary for a beneficial yoga practice.
If you’ve had a hip replacement, your surgeon may have given you specific movement restrictions, usually avoiding hip flexion past 90 degrees and avoiding crossing your legs. Chair yoga naturally respects these limits. Our post-hip replacement exercise guide provides additional movement strategies.
Balance Issues
Always practice near a wall or sturdy furniture. Don’t attempt standing balance poses in the middle of the room. Even with support, keep your gaze fixed on a non-moving point at eye level. Looking down or around disrupts your balance.
Consider practicing in a corner where two walls meet. This gives you support on two sides.
Limited Shoulder Mobility
Use a strap for any pose where your hands are supposed to meet behind your back. In cow face pose, one hand reaches
