Falls on ice and wet surfaces send hundreds of thousands of older adults to the emergency room every year. A hip fracture from a winter fall can permanently change your mobility, independence, and quality of life. The statistics are sobering: one in three adults over 65 who fracture a hip never return to their pre-injury level of function. Prevention is far easier than recovery.
This isn’t about staying inside all winter. It’s about modifying your approach so you can stay active safely even when conditions are slippery. For more guidance on maintaining your fitness routine during the colder months, check out our cold weather exercise tips for seniors.
Gait Modification Techniques
The way you walk on dry pavement doesn’t work on ice. Your normal stride is too long, your heel strike is too aggressive, and your weight transfer is too fast. On slippery surfaces, adopt the “penguin walk.”
Shorten Your Stride
Reduce your step length to about half your normal stride. Small steps keep your center of gravity over your feet. If your normal walking stride is 24-30 inches, aim for 12-15 inches on ice or wet pavement. This might feel awkward at first, but it dramatically reduces the force of any slip.
Walk Flat-Footed
Instead of striking with your heel and rolling to your toes, place your entire foot flat on the surface simultaneously. This maximizes the contact area between your shoe and the ground. Think about how a penguin waddles: the whole foot makes contact at once.
Keep Your Hands Free
Carrying bags shifts your balance and prevents you from catching yourself. Use a backpack or have someone else carry items. If you must carry something, keep it close to your body rather than extended to one side.
Lean Slightly Forward
A very slight forward lean keeps your weight over your front foot rather than your back foot, which is where most slips originate. Don’t exaggerate this. Just a few degrees of forward tilt from the ankles, not a bend at the waist.
Slow Down
Speed increases the force of any slip and reduces your reaction time. Walking 30% slower on ice is not being overly cautious; it’s being smart. A fall prevented is worth the extra minute it takes to reach your car.
Point Your Toes Out Slightly
A duck-footed stance of about 10-15 degrees outward increases your base of support and improves lateral stability. This works especially well on packed snow.
Proper Footwear
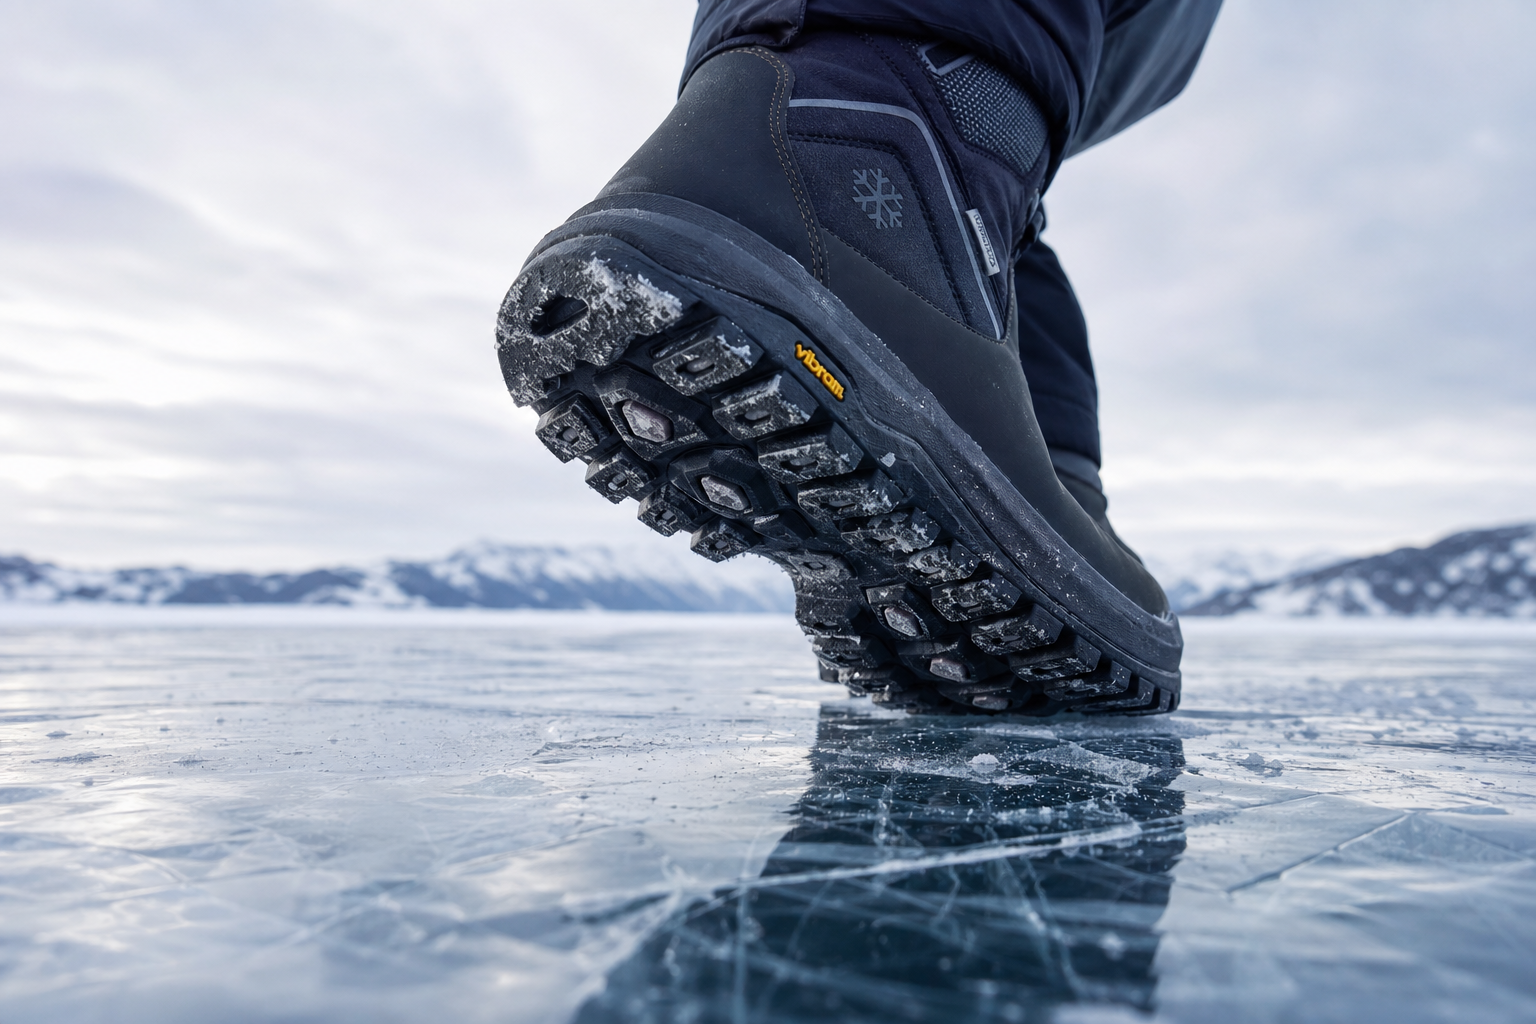
Your shoes are your primary defense against slipping. Smooth-soled dress shoes and many casual shoes have almost zero grip on ice or wet surfaces.

YakTrax Walk Ice Cleats
Slip-on traction devices with steel coils that bite into ice, transforming any shoe into winter-ready footwear
YakTrax Walk ice cleats are slip-on traction devices that fit over your regular shoes. They use steel coils embedded in a rubber frame to grip ice. They’re easy to put on and take off, and they make an enormous difference on icy sidewalks and parking lots. Keep a pair in your car and one by your front door. The coils bite into ice in a way no rubber sole can match.
For everyday winter shoes, look for boots with deep-lugged rubber soles. The deeper the tread pattern, the better the grip on wet and icy surfaces. Vibram soles are among the best for winter traction. Tread depth should be at least 5mm. Anything less provides minimal grip on ice.
Avoid boots with worn soles. Once the tread wears down to 2-3mm, grip drops substantially. Test your current winter boots by pressing your thumbnail into the sole. If the rubber feels hard and doesn’t yield, it’s lost flexibility and won’t grip well. Rubber hardens with age even if the boot looks fine.
Insulated boots are helpful, but don’t prioritize warmth over traction. A boot can be warm and still have terrible grip. Check reviews specifically for comments about traction, not just comfort or warmth.
Zip-up or pull-on boots are easier to manage than lace-up models if you have arthritis or limited flexibility. Just make sure they fit snugly enough that your foot doesn’t slide around inside, which compromises your balance.
Walking Aid Adjustments for Winter
Standard rubber tips on canes and walkers lose grip on ice. Ice tip attachments add a retractable metal spike to the bottom of your cane that bites into ice for secure planting. Many models flip up when you go indoors so you don’t scratch floors.
The spike flips down with your foot or a simple lever mechanism. Practice the flip action at home before you need to use it outside. Some users find it helpful to flip the spike down before stepping outside rather than trying to do it while standing on ice.
Rollator Users
Rollator users should switch to models with larger wheels (8+ inches) during winter, as small wheels get stuck in snow and slush. Lower your handlebar height slightly during winter, which lowers your center of gravity and improves stability. If you rely on a rollator daily, consider owning a second one set up specifically for winter conditions rather than constantly adjusting your primary unit. Our rollator vs walker guide provides more details on choosing the right mobility aid.
Walker Users
Walker users without wheels face the challenge of lifting and planting the walker on slippery surfaces. Ice tips for all four legs are essential. Some users add tennis balls over the back legs for easier sliding, but this only works on cleared, dry pavement. On ice or snow, you need ice tips on all contact points.
Quad Cane Users
For quad cane users, ice tips are available for all four feet. Standard quad canes with small bases don’t perform well in snow. A single-point cane with an ice tip often provides better stability in winter conditions than a quad cane without ice attachments.
Home Exterior Safety
Lighting
Install motion-activated LED lights at every entrance, along walkways, and near steps. Many falls happen because seniors can’t see the ice or wet spot. Solar-powered lights require no wiring. Place lights low enough to illuminate the walking surface, not just the general area. A light mounted 8 feet up might illuminate your face but leave the ground in shadow.
Handrails
Every exterior staircase should have a handrail on both sides. If yours has only one, adding a second is one of the most impactful fall prevention measures you can take. Handrails should extend beyond the top and bottom steps so you have something to grip before and after the stairs. Round rails (1.25 to 1.5 inches in diameter) are easier to grip than flat or square profiles.
Salt and Sand
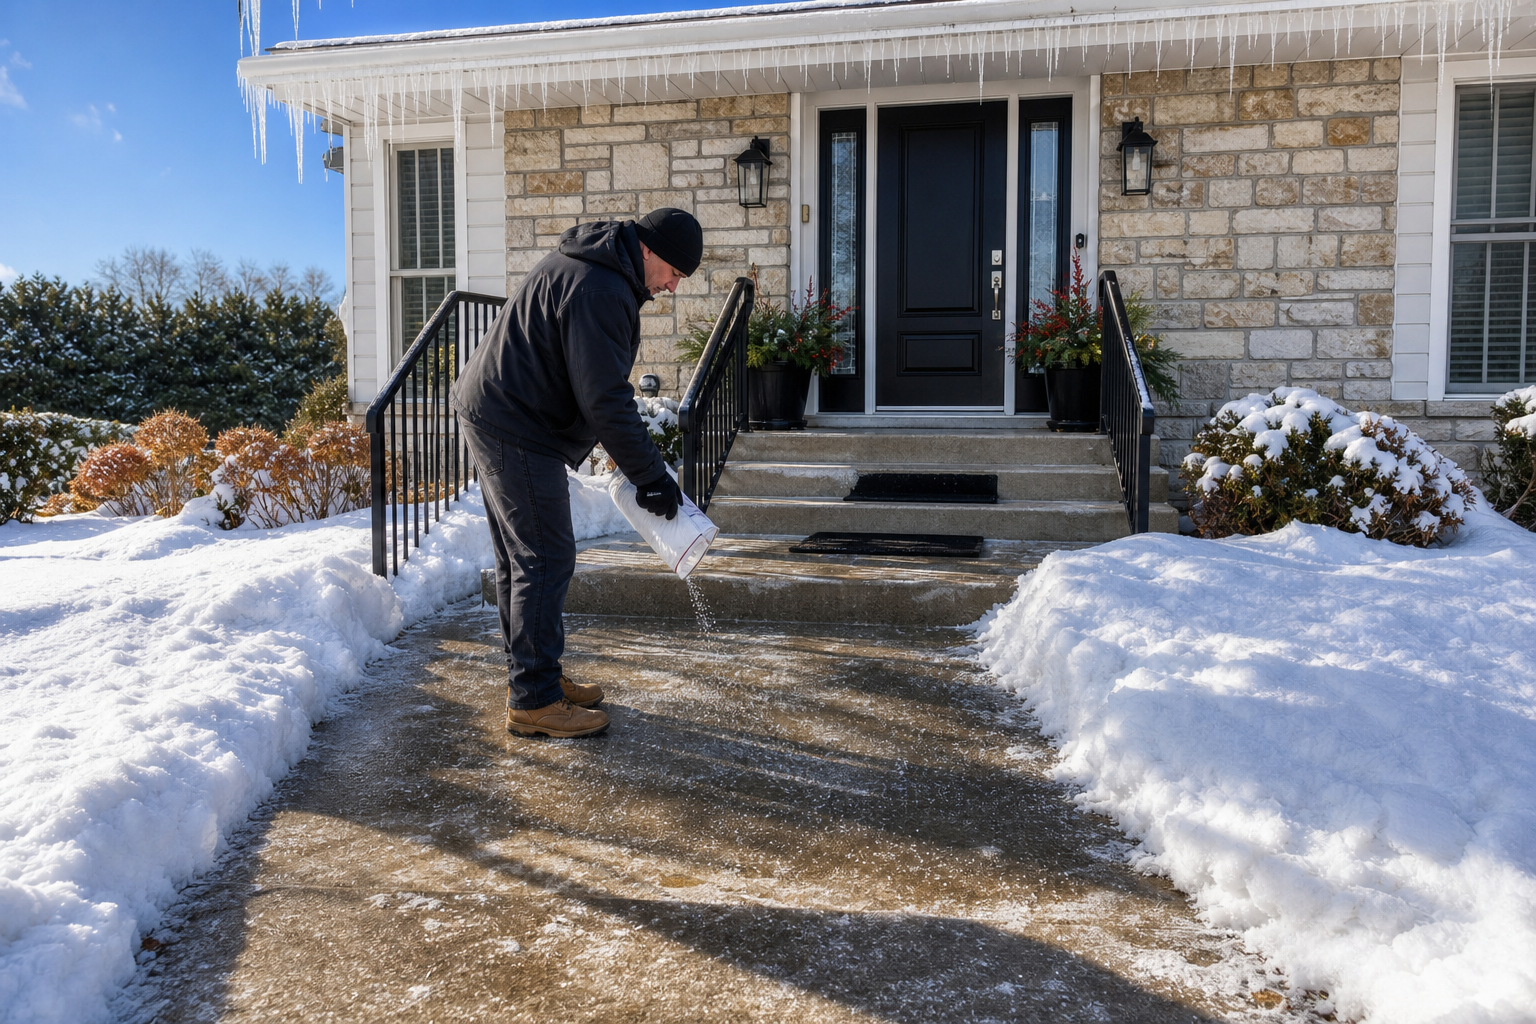
Keep a bucket of rock salt or sand near your front door. Apply it to steps and walkways before you need to walk on them. Calcium chloride works at lower temperatures than standard rock salt and melts ice faster. It’s effective down to about -25°F, while rock salt stops working around 15°F. Sand doesn’t melt ice but provides traction on top of it. A mix of both works well.
Mat Placement
Use absorbent mats inside every entrance to catch water and snow tracked in on shoes. Wet floors inside the house are just as dangerous as ice outside. Choose mats with rubber backing that won’t slide on your flooring. Replace saturated mats immediately. A soaked mat is a slip hazard.
Clear Pathways Regularly
Shovel snow as soon as possible after it falls. Packed snow turns into ice, which is much harder to remove. If you can’t shovel yourself, hire a service or ask a neighbor. Many communities have volunteer programs that help seniors with snow removal.
Install Grab Bars Near Exterior Doors
A grab bar beside your front door gives you something to hold while navigating slippery steps or putting on ice cleats. Mount it at a height you can comfortably grip while standing, typically around 36 inches from the ground.
Reactive Balance Training
Even with precautions, slips happen. Training your body to recover from a slip (rather than fall) is a critical and often overlooked skill.
Before starting these exercises, talk to your doctor, especially if you have balance issues, a history of falls, or any condition that affects stability. These drills are most effective when practiced regularly starting in early fall, before winter conditions arrive. For additional balance work, consider our guide to Tai Chi for seniors, which develops the slow, controlled movements that help prevent falls.
Quick Step Drills
Stand near a counter. Have someone gently push your shoulder from the side (or shift your own weight quickly to one side). Practice taking a quick recovery step to catch yourself. This trains the neural pathways for reactive stepping. Start with very gentle pushes and gradually increase the force as you get comfortable with the movement. The goal is to take one fast step in the direction of the push rather than letting your upper body continue moving while your feet stay planted.
Lateral Weight Shifts
Stand with feet wide. Shift quickly from one foot to the other, practicing the rapid weight transfer you’d need during a slip. Keep your knees slightly bent and your core engaged. This drill builds the hip and ankle strength needed to recover from a side-to-side slip.
Backward Stepping
Practice taking quick steps backward while holding a counter. Backward slips on ice are common, and the ability to step back quickly can prevent a fall. Start with slow, controlled steps and gradually increase your speed. The challenge is to step backward without looking behind you, which is what happens during an actual slip.
Single-Leg Stands with Perturbations
Stand on one foot while holding a counter lightly with one finger. Have someone tap your hip or shoulder gently from different directions. This forces your ankle and hip to make small, quick corrections to maintain balance. Work up to 30 seconds per leg.
Perform these drills 2-3 times per week throughout the fall and winter months. They take less than 5 minutes and can prevent the injury that changes everything. If you work with a physical therapist, ask them to incorporate reactive balance training into your sessions.
Environmental Awareness
Pay attention to conditions that increase fall risk. Black ice (thin, transparent ice on pavement) is nearly invisible but extremely slippery. It forms most often on bridges, overpasses, and shaded areas where the sun doesn’t reach. Early morning and evening temperatures below freezing create the highest risk.
Wet leaves on pavement are as slippery as ice. They’re common in fall and early winter. Avoid walking on leaf-covered sidewalks when possible. If you must cross them, use the penguin walk technique and test each step before transferring your full weight.
Transitions between surfaces are high-risk zones. Moving from salted pavement to unsalted ice, from a rubber mat to a wet floor, or from packed snow to clear pavement requires extra attention. Slow down at every transition and adjust your gait accordingly.
Watch for drainage areas and downspouts. Water runoff creates ice patches in predictable locations. If you know a particular spot on your walkway always ices up, treat it preventively even when it looks clear.
Getting Up After a Fall
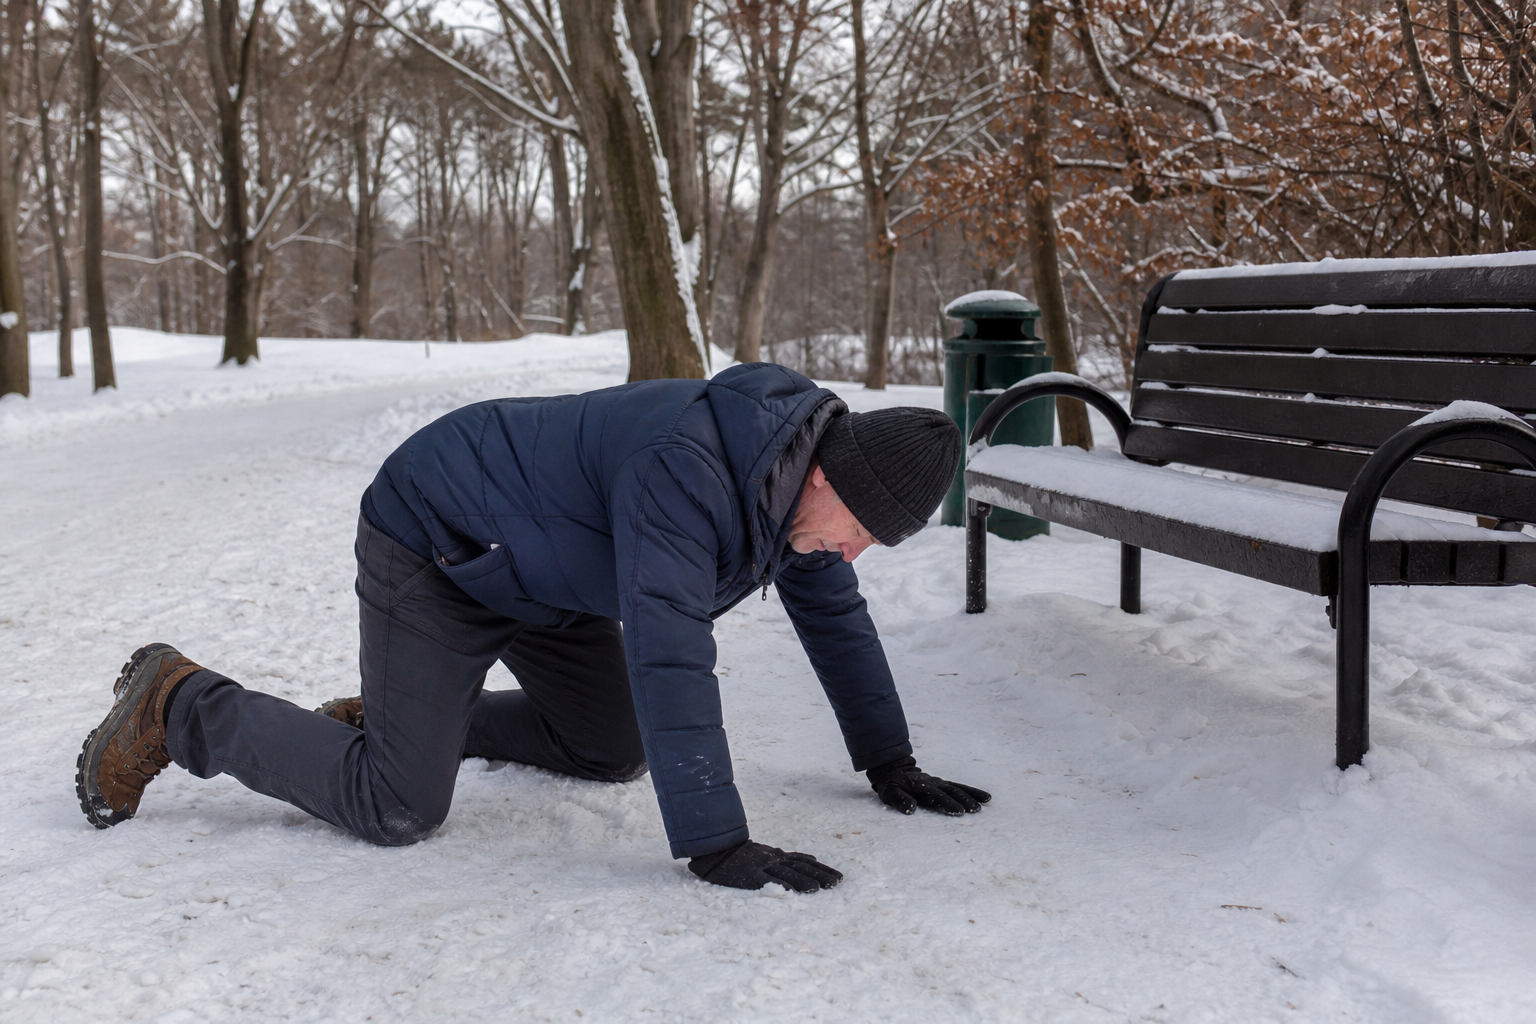
If you do fall on ice or a wet surface, don’t rush to stand up. Adrenaline can mask injuries. Take a moment to assess whether you’re hurt. Move slowly and check for pain in your hips, wrists, back, and head.
If you’re uninjured and can get up safely, roll onto your side, then onto your hands and knees. Crawl to a stable object like a bench, stairs, or your car. Use the object to pull yourself up gradually. Don’t try to stand up in the middle of an open, slippery area.
If you’re injured, can’t get up, or are in a location where getting up would require standing on ice, call for help. Keep your phone in an accessible pocket during winter, not buried in a purse or bag. Consider a personal emergency response device if you walk alone frequently in winter.
Planning Winter Outings
Choose Your Timing
Walk during midday when temperatures are warmest and ice is most likely to have melted. Morning ice that looks wet and harmless can refreeze by late afternoon as temperatures drop.
Scout Your Route
If you’re going somewhere new, call ahead and ask about their winter pathway maintenance. Many medical offices, grocery stores, and public buildings salt their walkways and entrances, but some don’t. Knowing what to expect helps you plan.
Park Strategically
Choose parking spots near entrances even if you have to wait a few minutes. A spot close to the door means less distance on potentially icy pavement. Park in areas you can see are salted or cleared.
Bring a Companion
Having someone walk with you provides an extra set of eyes for spotting hazards and assistance if you do slip.
Frequently Asked Questions
Should I avoid going outside in winter entirely?
No. Staying inactive all winter accelerates deconditioning, muscle loss, and depression. The goal is to modify your approach, not eliminate outdoor activity. Walk during midday when temperatures are warmest and ice is least likely. Choose cleared, salted paths when available. Indoor walking at a mall or community center is a good alternative on particularly treacherous days. Many communities have indoor walking tracks at recreation centers specifically for this purpose. Check out our winter exercise safety guide for indoor alternatives.
What should I do if I start to fall on ice?
Try to fall sideways or backward onto your buttocks rather than forward onto your hands and knees (which risks wrist fractures). Tuck your chin to protect your head. If you’re falling backward, try to roll to the side. Avoid reaching out with a straight arm to catch yourself, as this is the most common mechanism for wrist and shoulder fractures in seniors. If you’re carrying anything, drop it immediately to free your hands for a controlled landing.
Are there exercises that specifically prepare me for winter walking?
Yes. Ankle strengthening (calf raises, toe raises, ankle circles), hip abductor exercises (side leg lifts), and core stability work all improve your ability to maintain balance on slippery surfaces. The reactive balance drills described above are the most winter-specific training you can do. Tai chi classes are excellent for developing the slow, controlled movements and weight shifts that help prevent falls on ice. Talk to your doctor before starting any new exercise program. Our progressive resistance training program can help build the strength needed for better balance.
Can I use hiking poles or ski poles for winter walking?
Yes, and many older adults find them helpful. Poles with carbide or steel tips provide traction on ice. They give you four points of contact with the ground instead of two, which significantly improves stability. Nordic walking poles are designed for