Chair yoga brings all the benefits of traditional yoga (flexibility, balance, stress relief, and gentle strengthening) to people who can’t comfortably get down on the floor or hold standing poses for extended periods. If you’ve avoided yoga because of mobility limitations, balance concerns, or joint pain that makes floor work impractical, chair yoga removes every one of those barriers.
All you need is a sturdy chair without wheels and 15-20 minutes. No mat required.
Before starting any new exercise routine, check with your doctor, especially if you have a chronic condition, recent surgery, or balance issues that could affect your safety during movement.
Setting Up
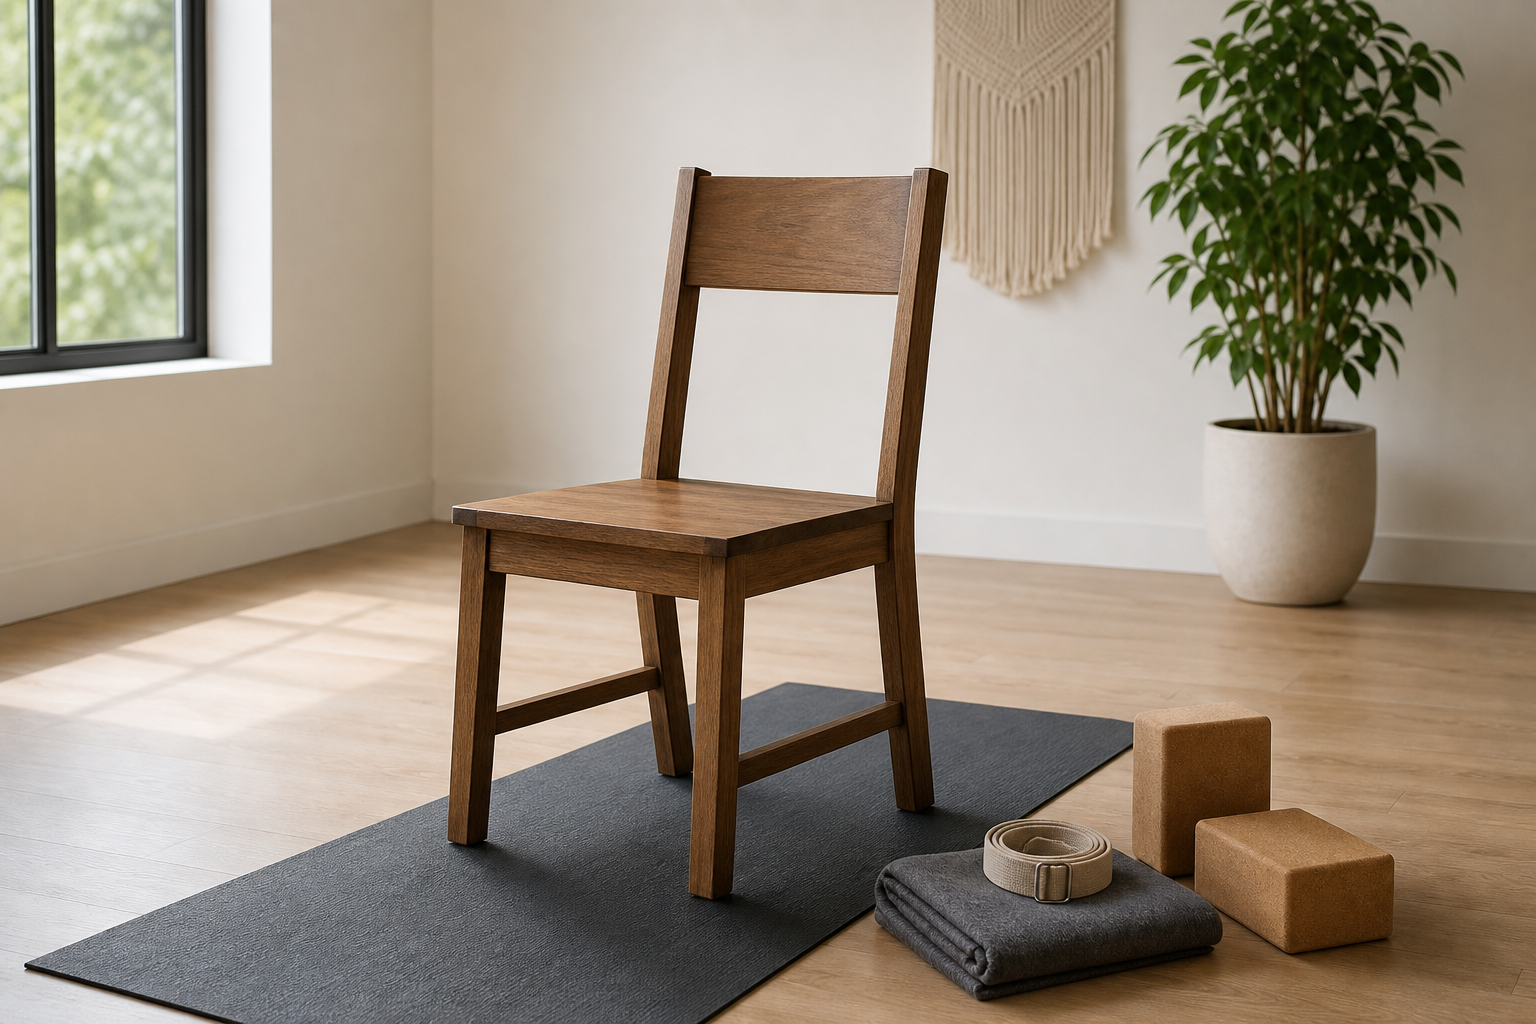
Choose a firm, armless chair (a kitchen or dining chair is perfect). Your feet should reach the floor flat when you’re seated, and your thighs should be roughly parallel to the floor. If the chair is too high, place a folded blanket on the floor under your feet. Sit toward the front edge of the chair with your spine tall and shoulders relaxed. This is your base position for all poses.
The chair should be stable enough that you can lean on it without fear of tipping. Test it before your first session. If you have a folding chair, make sure the locking mechanism is fully engaged. Avoid office chairs with wheels or swivel bases. They create unnecessary fall risk.
Position your chair on a non-slip surface. If you’re on hardwood or tile, place a yoga mat or non-slip rug pad under the chair legs to prevent sliding during poses that involve pressing down with your feet.

Non-Slip Yoga Mat
Provides stable surface for chair placement and prevents sliding during practice
8 Beginner Chair Yoga Poses
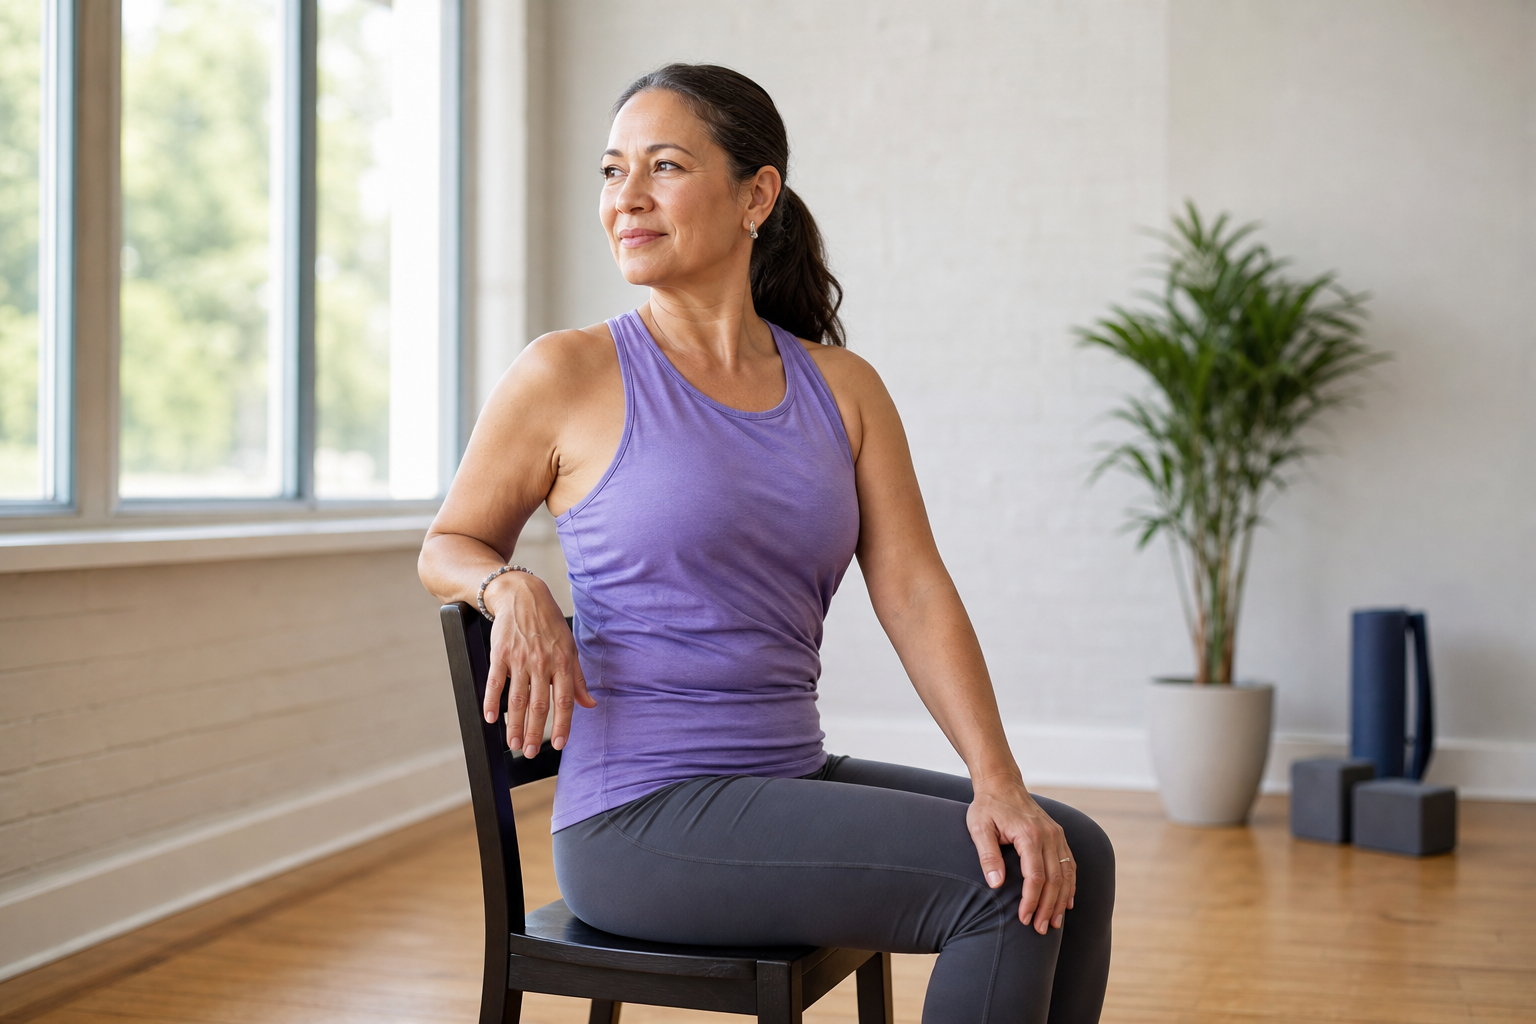
1. Seated Mountain Pose (Tadasana)
Sit tall with your feet flat on the floor, hip-width apart. Place your hands on your thighs, palms down. Roll your shoulders back and down, away from your ears. Lengthen through the top of your head as if a string were gently pulling you upward. Close your eyes and take 5 deep breaths: inhale through your nose for 4 counts, exhale through your mouth for 6 counts.
This pose looks simple, but it requires focused muscle engagement. Your abdominals should be gently active, not clenched. Your shoulder blades should slide down your back. Your jaw should be relaxed.
Benefits: Establishes proper posture, activates core muscles, and sets a calm, focused tone for the practice.
Modification for balance concerns: Keep your eyes open and focus on a point directly ahead of you. The visual anchor helps if closing your eyes makes you feel unsteady.
2. Seated Forward Fold (Uttanasana)
From seated mountain, inhale and reach your arms overhead. On the exhale, hinge forward from your hips (not your waist) and let your hands reach toward the floor or rest on your shins. Keep your spine as long as possible rather than rounding aggressively. Let your head hang heavy. Hold for 5 breaths, then slowly roll back up to sitting.
The goal is not to touch the floor. The goal is a gentle stretch along the back of your body. If your hamstrings are tight, your hands might only reach mid-shin or your knees. That’s exactly where they should be.
Benefits: Stretches the hamstrings, lower back, and spine. Promotes circulation to the brain and can help relieve mild tension headaches.
Modification for arthritis: Place your hands on your thighs and slide them toward your knees as you lean forward. Don’t reach for the floor if it causes back pain. You can also place a folded towel on your lap and rest your forearms on it as you fold forward. This reduces the distance you need to fold while still stretching the spine. For more guidance on arthritis-friendly exercises, check out our complete guide.
Modification for high blood pressure: Skip the arms overhead portion. Simply hinge forward with your hands on your thighs. Avoid letting your head drop below your heart for extended periods if you have uncontrolled hypertension.
3. Seated Cat-Cow
Place your hands on your knees. On the inhale, arch your back and look upward, opening your chest (cow). On the exhale, round your spine and tuck your chin toward your chest (cat). Flow between these two positions for 8-10 breaths, moving slowly and matching each movement to your breath.
This pose massages the discs between your vertebrae with gentle, rhythmic compression and expansion. Move at your own pace. If the traditional breath pattern feels rushed, take two breaths per movement instead of one.
Benefits: Mobilizes the entire spine, relieves stiffness, and warms up the back muscles. Particularly helpful first thing in the morning when your spine is stiff from sleep.
Modification for neck pain: Keep your head in a neutral position instead of looking up and down. The neck is part of your spine, but it doesn’t need to move through the full range if doing so causes discomfort.
4. Seated Spinal Twist (Ardha Matsyendrasana)
Sit tall with your feet flat. Place your left hand on your right knee and your right hand on the chair back or seat behind you. On the inhale, lengthen your spine. On the exhale, gently rotate your torso to the right, looking over your right shoulder. Hold for 5 breaths, then return to center and repeat on the other side.
The twist should feel like a gentle squeeze, not a wringing motion. Your hips stay square and facing forward. The rotation happens in your mid and upper back, not your lower back or neck.
Benefits: Improves spinal rotation, stretches the obliques and back muscles, and aids digestion by massaging the internal organs.
Modification: If rotating causes pain, reduce the depth of the twist. A gentle rotation is still effective. You can also place your hand on the side of the chair seat instead of reaching behind you, which requires less shoulder mobility.
When to skip this pose: Avoid spinal twists if you have a herniated disc, recent abdominal surgery, or pregnancy. Check with your healthcare provider if you have spinal stenosis or osteoporosis.
5. Seated Warrior (Virabhadrasana II Modified)
Turn sideways in your chair so your right thigh is along the front edge. Extend your left leg straight behind you with the ball of your foot on the floor. Raise both arms to shoulder height, parallel to the floor, right arm forward and left arm back. Look over your right fingertips. Hold for 5 breaths. Switch sides.
This pose builds stamina. If your arms fatigue before 5 breaths, lower them briefly, then raise them again. You’re training your shoulders to hold a position, which translates directly to everyday activities like reaching into cupboards or hanging clothes.
Benefits: Opens the hips, strengthens the legs, and builds shoulder endurance, all with the security of the chair. Improves the hip extension that’s needed for a full stride when walking.
Modification for knee problems: Keep your back leg slightly bent rather than straight. You’ll still get the hip stretch without putting pressure on the back knee. If you’re recovering from knee surgery, our post-knee replacement exercises guide offers additional modifications.
Modification for shoulder pain: Lower your arms to chest height or even waist height. The leg position is where most of the benefit comes from anyway.
6. Seated Eagle Arms (Garudasana Arms)
Extend both arms in front of you. Cross your right arm over the left at the elbows. If possible, bring the backs of your hands together, or even wrap your forearms so your palms touch. Lift your elbows slightly while dropping your shoulders. Hold for 5 breaths, then switch which arm is on top.
If you can’t wrap your arms fully, hold opposite shoulders instead. You’ll still get a stretch across your upper back.
Benefits: Stretches the upper back, shoulders, and the space between the shoulder blades. Relieves tension from poor posture and counteracts the rounded shoulders that develop from computer work or reading. For more on fixing posture issues, see our posture correction exercises guide.
Modification for limited shoulder mobility: Simply cross your arms in front of your chest and hold opposite elbows. This creates a similar stretch without requiring the arm wrap.
7. Seated Pigeon (Figure-4 Stretch)
Cross your right ankle over your left knee, creating a figure-4 shape. Flex your right foot to protect the knee. Sit tall and gently press your right knee downward with your right hand. For a deeper stretch, lean your torso slightly forward from the hips. Hold for 5-8 breaths. Switch sides.
Many people feel this stretch immediately in the outer hip and glute of the crossed leg. If you feel sharp pain in your knee (not a stretch sensation, but actual joint pain), uncross your leg immediately and try placing your ankle lower on your shin instead of on your knee.
Benefits: Opens the hip rotators and stretches the piriformis muscle, which is commonly tight from prolonged sitting. Tight hips contribute to lower back pain and difficulty with movements like getting in and out of cars.
Modification for knee replacement: Skip this pose or consult your physical therapist first. The position can stress a knee prosthesis. Our post-hip replacement exercise guide offers additional considerations for those with joint replacements.
Modification for very tight hips: Place your ankle on your opposite thigh closer to your knee rather than crossing it fully. Even this smaller movement will provide a stretch.
8. Seated Savasana (Closing Relaxation)
Sit back comfortably in the chair. Place your hands in your lap or on your thighs, palms up. Close your eyes. Relax every muscle from your toes to your scalp. Breathe naturally for 2-3 minutes. This final pose lets your nervous system integrate the benefits of the practice. Don’t skip it.
If sitting upright feels uncomfortable for relaxation, lean back against the chair and place a small pillow behind your lower back. Some people prefer to rest their hands on their belly to feel the rise and fall of their breath.

Lumbar Support Pillow
Adds comfort during seated relaxation and supports proper posture throughout practice
A Complete 15-20 Minute Daily Sequence
Perform the 8 poses in order. Spend 1-2 minutes on each pose (including both sides where applicable). This natural flow takes 15-20 minutes and covers the full body: spine, hips, shoulders, and neck. Practice daily for the best results, or at minimum 3-4 times per week.
Consistency matters more than duration. Three 15-minute sessions per week will show better results than one 45-minute session. Your body adapts to regular movement patterns, not sporadic intense efforts.
Track your flexibility gains by noting how far you can comfortably fold forward or how easily you can cross your ankle over your knee. These markers give you concrete feedback without requiring complicated measurements.
Breathing Techniques for Chair Yoga

Breath control (pranayama) amplifies the benefits of the physical poses. Start each session with 2-3 minutes of simple breath awareness: notice the natural rhythm of your inhale and exhale without trying to change it. Then shift to controlled breathing.
Three-part breath: Inhale through your nose and feel your belly expand first, then your ribcage, then your chest. Exhale in reverse order: chest, ribs, belly. This pattern ensures you’re using your full lung capacity.
Box breathing: Inhale for 4 counts, hold for 4 counts, exhale for 4 counts, hold empty for 4 counts. Repeat 5 times. This technique calms the nervous system and is particularly helpful if you’re using chair yoga for stress management.
Never force your breath. If a breathing pattern makes you dizzy or anxious, return to normal breathing. Breath work should feel grounding, not stressful.
Progressing Safely
After 4-6 weeks of consistent chair yoga, you may want to add standing poses with chair support. Use the chair back as a balance aid for standing poses like tree pose, warrior I, and standing forward fold. This hybrid approach bridges the gap between seated and traditional yoga as your strength and confidence grow.
Place the chair in front of you with the backrest facing you. Hold the top of the backrest lightly with your fingertips, not a death grip. You’re using it for balance feedback, not to hold yourself up.
Try standing mountain pose first: stand behind the chair, fingertips on the backrest, feet hip-width apart. Hold for 10 breaths. If that feels stable, progress to standing poses that shift your weight, like standing side bend or standing spinal twist.
Another progression path is increasing your hold time in each pose. If you’re currently holding for 5 breaths, work up to 8 breaths, then 10. Longer holds build endurance and deepen the stretch.
You can also add dynamic movement to static poses. In seated cat-cow, for example, add arm circles: as you arch into cow pose, circle your arms overhead. As you round into cat pose, bring your arms forward and round them like you’re hugging a large ball. This challenges coordination and adds an upper body workout.
Common Mistakes and How to Avoid Them
Rushing through poses: Chair yoga isn’t about checking boxes. If you only have 10 minutes, do 5 poses slowly rather than racing through all 8. The therapeutic benefit comes from sustained, mindful stretching, not rapid movement.
Holding your breath: When a pose feels challenging, the instinct is to hold your breath and tense up. That’s counterproductive. Conscious breathing keeps your muscles supplied with oxygen and signals your nervous system to stay calm. If you notice you’re holding your breath, you’ve pushed too far into the pose. Back off slightly.
Comparing yourself to others: Your hamstring flexibility has nothing to do with anyone else’s. Your forward fold will look different than your neighbor’s. That’s not a problem to fix.
Skipping the setup: Proper chair height and positioning isn’t optional. A chair that’s too low or too high changes your joint angles and can turn a safe stretch into an uncomfortable strain. Spend 2 minutes getting your setup right before you start.