A bad back doesn’t have to mean no exercise. In fact, the right exercises are one of the most effective treatments for chronic back pain, reducing symptoms as well as or better than many medications. The challenge is knowing which movements strengthen your back without aggravating it.
These 10 spine-safe exercises were selected because they build core and posterior chain strength while keeping your spine in a neutral, protected position. Before starting any new exercise program, especially if you have chronic back pain or a history of back injuries, talk to your doctor or physical therapist. They can help you determine which exercises are appropriate for your specific condition and guide you on proper form.
Exercises to Avoid (and Why)
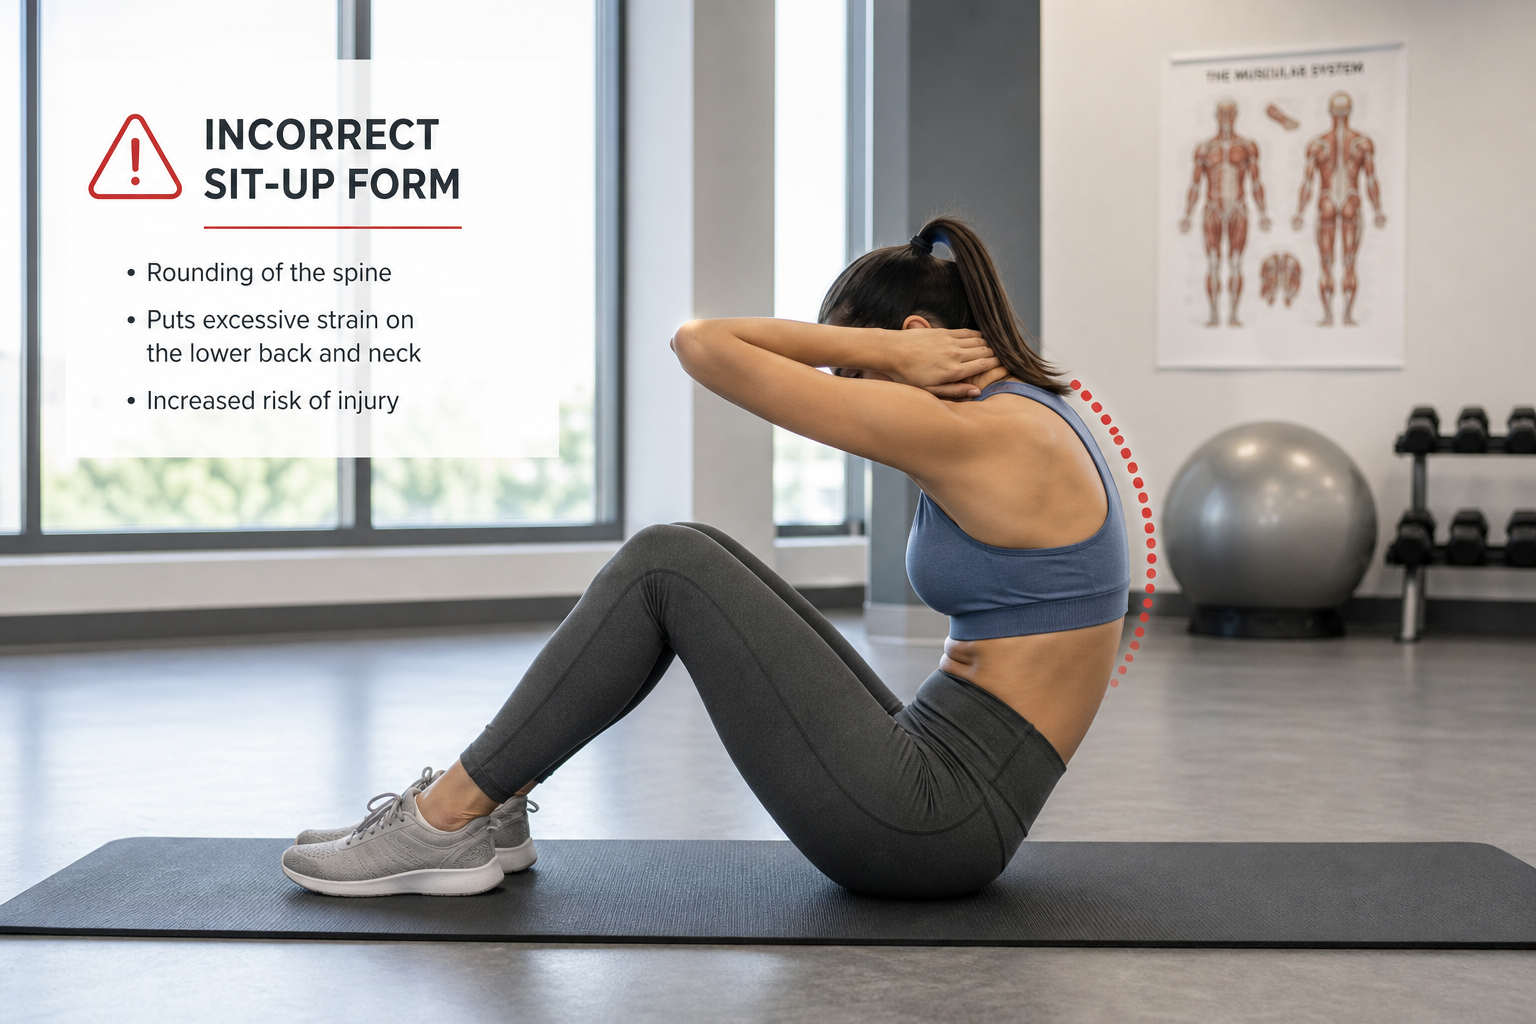
Before the good stuff, a quick word on what not to do. Sit-ups and crunches compress the front of your spinal discs repeatedly, which is the exact mechanism of disc herniation. Each repetition loads the disc in flexion, the position where most herniations occur.
Toe touches (standing or seated) load the spine in its most vulnerable position, combining forward flexion with the compressive force of your upper body weight. Superman exercises (lying face-down and lifting both arms and legs) hyperextend the lumbar spine under load, compressing the facet joints and potentially irritating nerve roots.
Loaded back extensions on a machine compress the facet joints and discs while your spine is in an extended position. All four of these are popular exercises that make most back conditions worse.
The common thread: these movements either repeatedly compress spinal discs in vulnerable positions or load the spine at extreme ranges of motion. The exercises below take the opposite approach, building strength while keeping your spine stable and protected.
The 10 Spine-Safe Movements
1. McGill Curl-Up
Named after Dr. Stuart McGill, the world’s leading spine biomechanist, this exercise replaces the crunch with a spine-safe alternative. Lie on your back with one knee bent and one leg straight. Place your hands under your lower back to maintain its natural arch.
Lift only your head and shoulders about 1-2 inches off the floor, hold for 10 seconds, and lower. Do not flatten your back against the floor. The small lift is intentional. You’re not trying to sit up. You’re creating tension in the abdominal muscles while your spine stays in neutral.
Perform 3 sets of 5 holds, then switch which leg is bent.
Common mistake: lifting too high. If your lower back starts to flatten or lift off your hands, you’ve gone too far. The exercise works in that first inch or two of lift.
2. Side Plank (Modified)
Lie on your side with your knees bent at 90 degrees. Prop yourself up on your forearm with your elbow directly under your shoulder. Lift your hips off the floor until your body forms a straight line from your shoulder to your knees.
Hold for 10-15 seconds. Perform 3 holds per side. Progress to straight-leg side planks as you get stronger. This exercise builds the lateral core muscles (quadratus lumborum, obliques, gluteus medius) that stabilize your spine during walking and turning.
If holding the position is too challenging initially, start by just lifting your hips an inch or two off the floor and holding there. You can also drop to your hip briefly between holds rather than holding continuously.
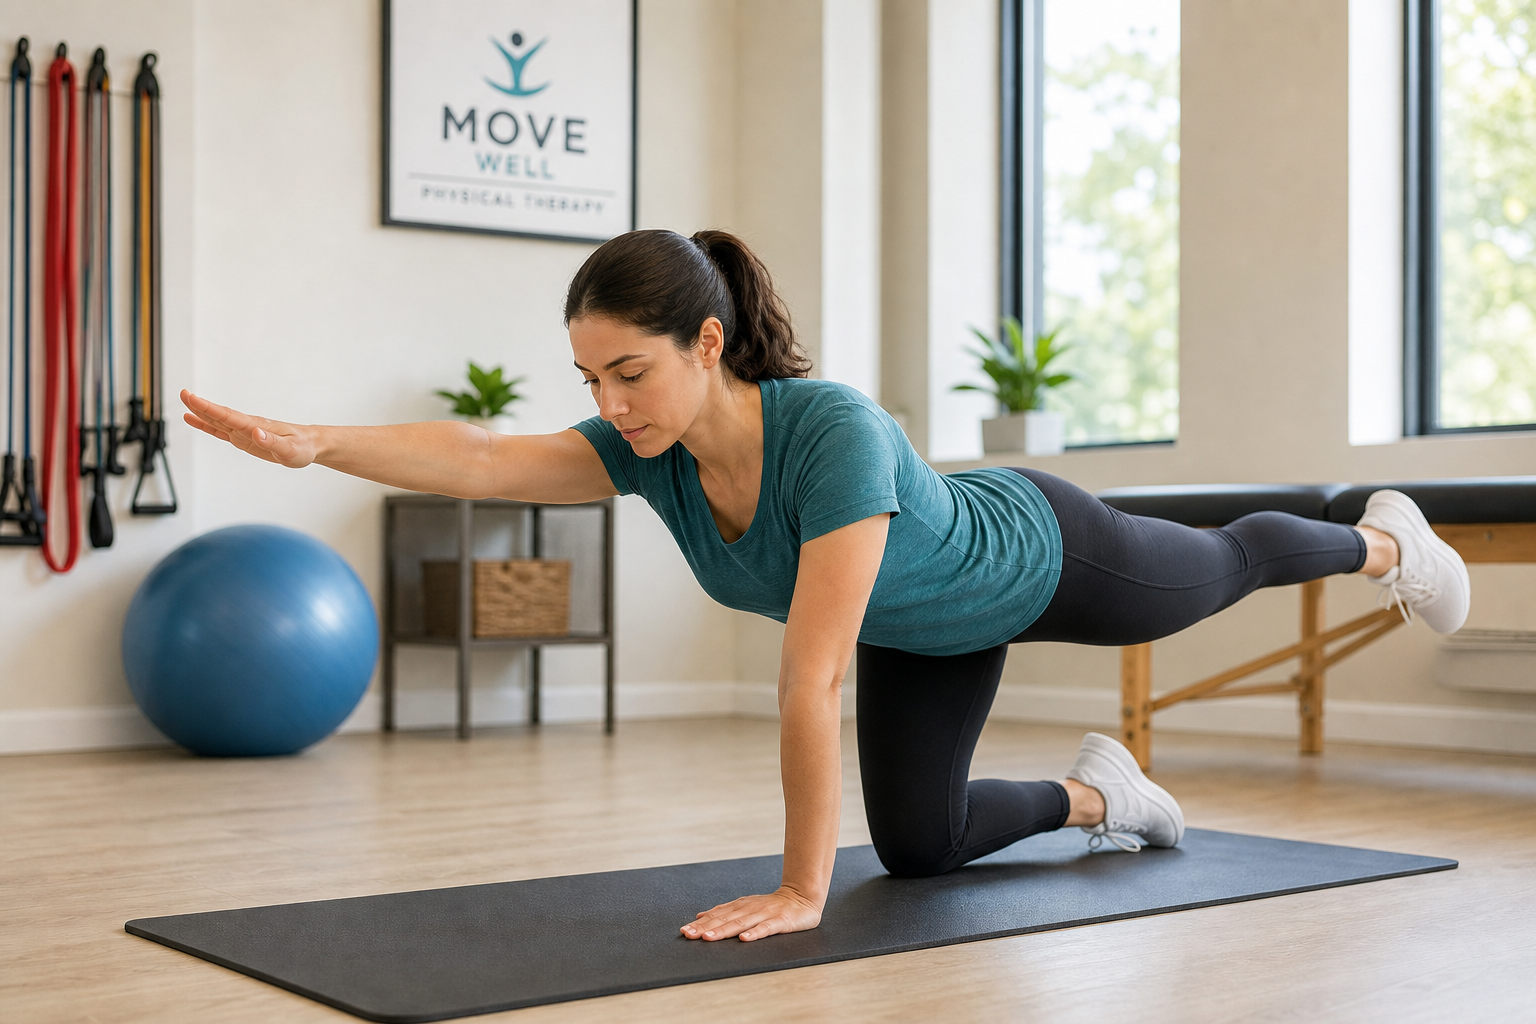
3. Bird Dog
Start on hands and knees. Extend your right arm forward and left leg backward simultaneously, creating a straight line from fingertips to toes. Hold for 10 seconds, return to start, and repeat on the opposite side. Perform 3 sets of 5 per side.
The key is keeping your lower back completely still throughout the movement. If your hips rock side to side, you’re extending too far.
Many people find it easier to start by practicing arm-only or leg-only versions before combining them. Extend just your arm, hold, return. Then extend just your leg. Once you can do each separately without your back moving, combine them.
To check your form, place a small object (like a tennis ball) on your lower back. If it stays put throughout the movement, your spine is stable. If it rolls off, you’re moving too much.

Exercise Mat for Back Pain
A thicker mat provides extra cushioning for floor exercises and makes getting down and up more comfortable
4. Glute Bridge
Lie on your back with knees bent and feet flat on the floor, positioned about hip-width apart. Push through your heels to lift your hips until your body forms a straight line from shoulders to knees. Squeeze your glutes at the top for 3 seconds, then lower slowly. Perform 3 sets of 12.
This strengthens the glutes (which are often weak in people with back pain) without loading the spine. The glutes are designed to extend the hip, a job that the lower back muscles often compensate for when glutes are weak. By rebuilding glute strength, you reduce the workload on your spine during everyday movements like standing up, climbing stairs, and walking.
Make sure you’re actually using your glutes. Place your hands on your buttocks during the bridge. You should feel them contract firmly at the top of the movement. If you feel the contraction more in your hamstrings or lower back, adjust your foot position slightly closer to your body.
5. Clamshell
Lie on your side with knees bent at 45 degrees, feet together. Keeping your feet touching, open your top knee like a clamshell, then close slowly. Perform 3 sets of 15 per side.
This targets the gluteus medius, which stabilizes your pelvis during walking and prevents the lateral hip drop that stresses the lower back. Add a mini loop resistance band around your knees when bodyweight becomes easy.
The gluteus medius is a small but crucial muscle. When it’s weak, your pelvis drops to one side with each step you take, creating a side-to-side rocking motion that strains the lower back. Strengthening it creates a more stable walking pattern.
Keep your hips stacked vertically throughout the movement. Don’t let your top hip roll backward as you open your knee. The movement should be pure hip rotation with no shifting of your pelvis.
6. Band Pull-Apart
Stand holding a light resistance band in front of you at chest height, arms straight. Pull the band apart by squeezing your shoulder blades together until the band touches your chest. Return slowly. Perform 3 sets of 15.
This strengthens the upper back muscles (rhomboids, middle trapezius, rear deltoids) that counteract the forward-hunching posture that compresses the lumbar spine.
Most people spend significant time in positions that round the upper back forward: sitting at computers, driving, reading. This prolonged forward posture shifts your center of gravity forward, forcing your lower back to work harder to keep you upright. Strengthening the muscles that pull your shoulders back helps restore a more balanced, upright posture that takes load off the lumbar spine.
Start with a band light enough that you can complete all repetitions with good form. The last few reps should feel challenging, but you shouldn’t have to use momentum or change your body position to complete them.
For more guidance on fixing poor posture, check out our posture correction exercises for seniors.
7. Dead Bug
Lie on your back with arms reaching toward the ceiling and knees bent at 90 degrees. Slowly lower your right arm overhead and left leg toward the floor simultaneously, keeping your lower back pressed flat. Return and repeat on the opposite side. Perform 3 sets of 8 per side.
This teaches your core to stabilize while your limbs move, which is exactly what your back needs during everyday activities.
The name comes from the starting position, which resembles a dead bug lying on its back with legs in the air. The exercise challenges your ability to keep your spine stable while your arms and legs create a destabilizing force.
If you have trouble keeping your back flat, don’t lower your limbs as far. Extend just a few inches at first. As your core gets stronger, you’ll be able to reach farther while maintaining the flat-back position. Some people find it helpful to exhale as they extend and inhale as they return to start.
8. Pallof Press
Anchor a resistance band at chest height. Stand sideways to the anchor and hold the band at your chest with both hands. Press it straight out in front of you and resist the band’s pull trying to rotate your torso. Hold for 3 seconds, return. Perform 3 sets of 10 per side.
This builds anti-rotation strength, protecting your spine during activities that involve twisting forces.
You’ll need something sturdy to anchor the band: a pole, a door anchor attachment, or a weight rack. Stand far enough from the anchor that the band has moderate tension even when held at your chest.
The challenge here is resisting rotation, not creating it. The band wants to pull you toward the anchor point. Your core muscles work to keep your torso facing forward. Stand with feet shoulder-width apart for better stability. If you’re wobbling significantly, you may be standing too far from the anchor or using too heavy a band.

Resistance Band Set with Door Anchor
A set with multiple resistance levels and a door anchor lets you perform Pallof presses and band pull-aparts at home
9. Cat-Cow (Gentle)
On hands and knees, slowly arch your back upward (cat) and then gently sag it downward (cow). Move through a comfortable range only. Don’t push into the extremes. Perform 10 slow repetitions.
This mobilizes the spine segment by segment without loading it, making it an excellent warm-up for any back-safe routine.
The movement should be smooth and controlled. Take 3-4 seconds to transition from cat to cow, and another 3-4 seconds to return. You’re not trying to achieve maximum range of motion. You’re gently exploring the range you have without forcing anything.
Many people find this movement soothing during back flare-ups. It gently moves the spine through flexion and extension while the hands-and-knees position unloads it, reducing compression on the discs.
10. Wall Sit
Stand with your back against a wall. Slide down until your knees are bent at about 45-60 degrees (not a full 90). Hold for 15-30 seconds. Perform 3 holds.
The wall supports your back while you build quadriceps and glute strength. Stronger legs take load off your back during daily activities like getting out of chairs and climbing stairs.
Don’t go as low as a traditional wall sit. A full 90-degree knee bend creates excessive compression on the knee joint, which can be problematic for older adults or those with knee issues. The shallower angle still builds strength while being gentler on the joints.
Position your feet about 12-18 inches from the wall, hip-width apart. Your back should be flat against the wall from your tailbone to your shoulder blades. If you start to slide down or your back arches away from the wall, the hold is over. Rest and repeat.
Building Your Routine
Perform exercises 1-3 (the McGill Big Three: curl-up, side plank, bird dog) daily. These three movements form the foundation of spine stability. They take about 5-7 minutes total.
Add 3-4 of the remaining exercises on training days (3 times per week). A complete session takes 15-20 minutes. Start with the minimum repetitions and sets listed, and increase gradually over 4-6 weeks.
A sample weekly schedule might look like this:
Daily (7 days): McGill curl-up, side plank, bird dog
Monday, Wednesday, Friday: Add glute bridge, clamshell, band pull-apart, wall sit
Tuesday, Thursday, Saturday: Add dead bug, Pallof press, cat-cow (additional session beyond daily warm-up)
Sunday: McGill Big Three only (active recovery)
The daily work on the Big Three builds consistent core endurance. The alternating exercises on training days build overall strength without overloading any single muscle group.
If you’re looking for additional ways to strengthen your core safely, our lower back pain exercises guide offers complementary movements.
Progression Guidelines
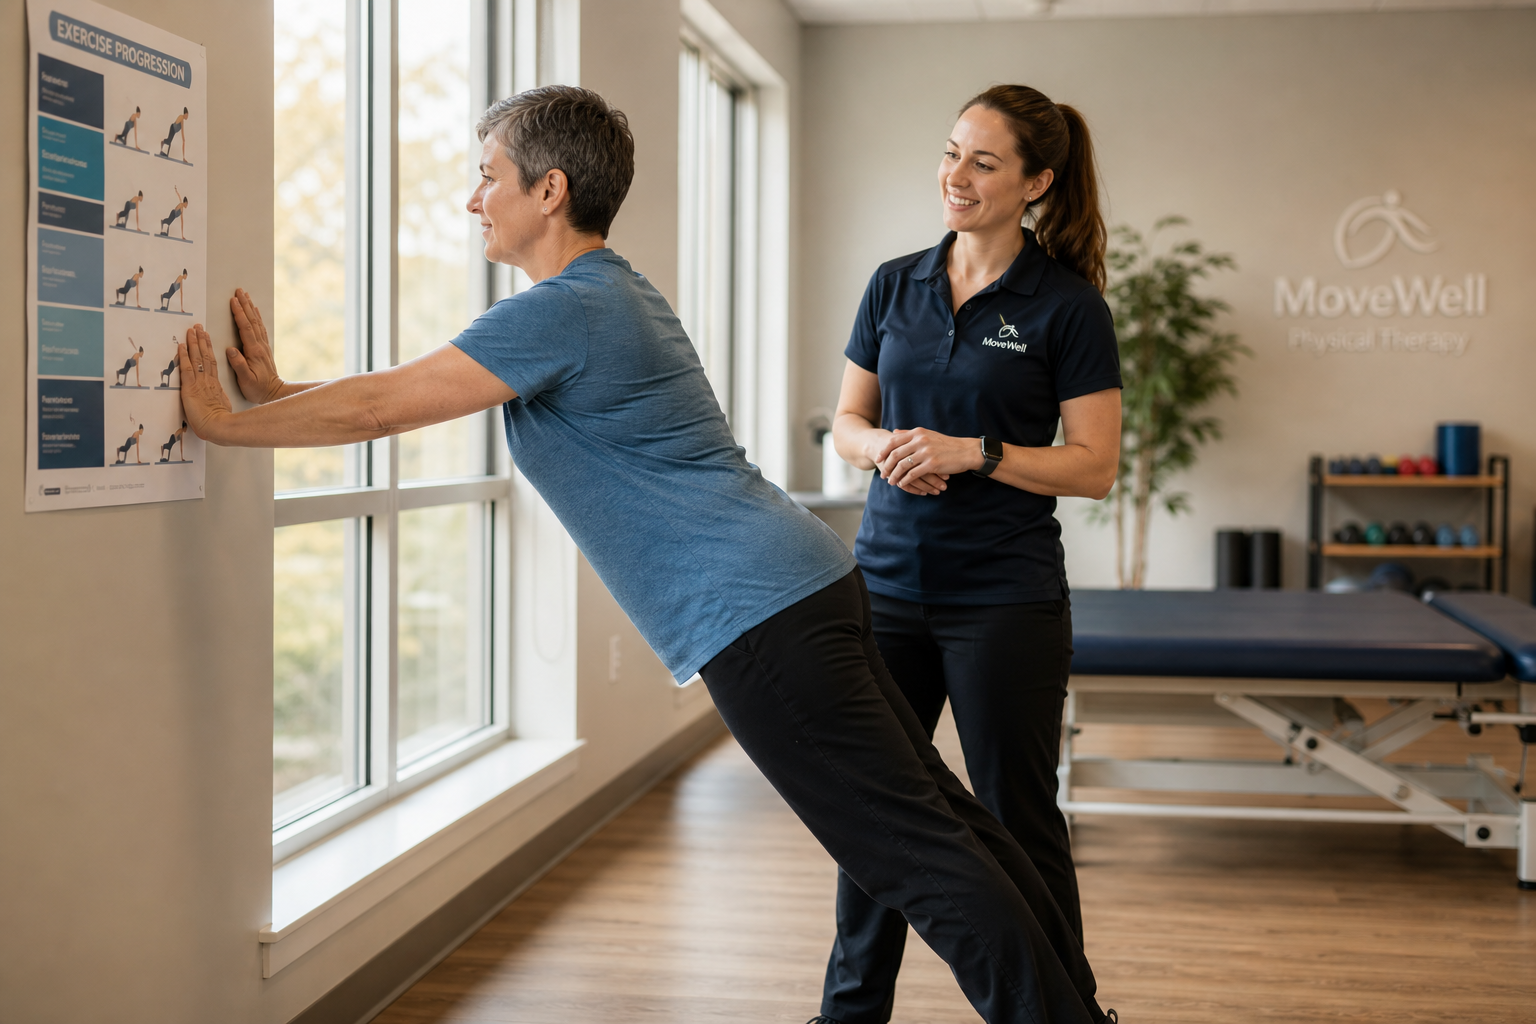
Start conservatively. Use the minimum reps and sets listed for each exercise. Master the form before adding difficulty. Bad form under load is how people hurt themselves.
After two weeks of consistent training with good form, you can progress. Options include:
- Adding 1-2 reps per set
- Adding one additional set
- Increasing hold times by 2-3 seconds
- Using a slightly stronger resistance band
- Moving from modified to full versions (bent-knee to straight-leg side plank, for example)
Progress only one variable at a time. If you add reps, don’t also add sets in the same week. Small, steady increases are safer and more sustainable than big jumps.
If an exercise causes pain (not fatigue or burn in the working muscles, but actual pain in your back or joints), stop. Drop back to an easier version or skip that exercise and consult with a physical therapist about your form.
For a structured approach to gradual progression, our 12-week strength building program provides a detailed framework.
When to Seek Professional Help
These exercises can help many people with back pain, but they’re not appropriate for everyone in every situation. See a physical therapist or spine specialist if:
- Your pain radiates down your leg below the knee
- You experience numbness, tingling, or weakness in your legs or feet
- You have difficulty controlling your bladder or bowels
- Your pain is severe and doesn’t improve with rest or position changes
- You’ve had back pain for more than 6-8 weeks without improvement
- Your pain is worse at night or wakes you from sleep
A professional can assess your specific condition, identify any structural issues that need addressing, and guide you on which exercises are safest for your situation.
If you’ve experienced sciatica symptoms (pain radiating down the leg), our sciatica management guide covers specialized nerve pain relief techniques.
Returning to Exercise After Surgery
If you’ve had back surgery, hip replacement, or knee replacement, these exercises may need modification. Always get clearance from your surgeon before starting any exercise program after surgery. They know