The most dangerous part of home exercise for seniors isn’t the exercise itself. It’s the environment. A loose rug that slides underfoot during a lunge. A chair that tips when you lean on it. A cord that catches your ankle during a side step. A dim corner that hides a mat edge. Setting up a dedicated, fall-safe exercise space takes 30 minutes and eliminates the environmental hazards that cause most home exercise injuries.
Falls during home exercise rarely happen because an exercise is too hard. They happen because the environment isn’t set up to support safe movement. A mat shifts. Vision is poor in one corner. The chair you’re using for support wobbles. These are fixable problems, and fixing them requires no special skills, just deliberate attention to your space.
Choosing the Right Room
Your exercise space should have a hard, flat floor (tile, hardwood, or low-pile carpet), enough room for movement (minimum 6×8 feet of clear space), a wall or counter within arm’s reach from your exercise position, adequate overhead lighting, and proximity to a bathroom. Spare bedrooms, living room corners, and wide hallways all work if they meet these criteria.
Avoid rooms with high-pile carpet (unstable underfoot for balance exercises), limited lighting (increases trip risk), and slippery floors without mats (tile and hardwood can be dangerously slick in socks or bare feet).
Temperature matters too. A room that’s too cold makes muscles tight and reluctant to stretch. Too warm and you’ll fatigue faster, which degrades coordination and increases fall risk. Aim for 68-72 degrees. If the room tends to be cold, warm it up 10 minutes before you start. If it’s warm, use a fan positioned so it doesn’t blow directly at you (which can dry eyes and affect balance). For those who prefer exercising in garage spaces, temperature control becomes even more critical during extreme weather conditions.
Natural light is a bonus but not required. A window provides visual reference points that help with balance, and daylight has mood benefits that make it easier to stick with a routine. However, controlled artificial lighting is often better for safety because it doesn’t change with weather or time of day.
Consider noise and privacy. If you need to hear instructions from a video or app, the room should be quiet enough that you don’t have to strain. If you’re self-conscious about others watching, choose a space where you can close the door. Self-consciousness creates tension, which reduces movement quality and makes you more prone to missteps.
Floor level matters. First-floor spaces are safest. If you fall, help can reach you faster. If you need to call for help, emergency responders don’t have to navigate stairs. If your only option is an upstairs room, make sure the stairway has a secure handrail and good lighting. Don’t exercise when fatigued from climbing stairs.
Essential Safety Setup
Non-Slip Exercise Mat
A thick, non-slip exercise mat (6-8mm) provides cushioning for kneeling and lying exercises and prevents your feet from sliding during standing work. Choose a mat at least 2×6 feet so you have room to stand, step, and move without stepping off the edge. Tape the mat’s edges to the floor with double-sided carpet tape if it tends to bunch or shift during use.

Non-Slip Exercise Mat
Look for 6-8mm thickness with textured rubber backing for optimal grip and cushioning
Mat thickness is a balance. Too thin (under 4mm) and your knees and hips hurt during floor exercises. Too thick (over 10mm) and the surface becomes unstable for standing balance work. The 6-8mm range provides cushioning without creating a soft, wobbly surface.
Test the mat’s grip before buying. Press your hand on it and push. Does it slide on your floor surface? If so, it will slide under your feet. Look for mats with textured undersides or grippy rubber backing. Yoga mats designed for hot yoga tend to have excellent grip because they’re made to stay put when wet.
Mat color matters for visibility. Choose a color that contrasts with your floor. If you have dark hardwood, get a light-colored mat. Light tile? Dark mat. The edge of the mat needs to be visible in your peripheral vision so you don’t accidentally step off during side steps or lunges.
Clean the mat weekly with mild soap and water. Dirt and sweat create a slippery film. A clean mat grips better.
Wall-Mounted Grab Bar
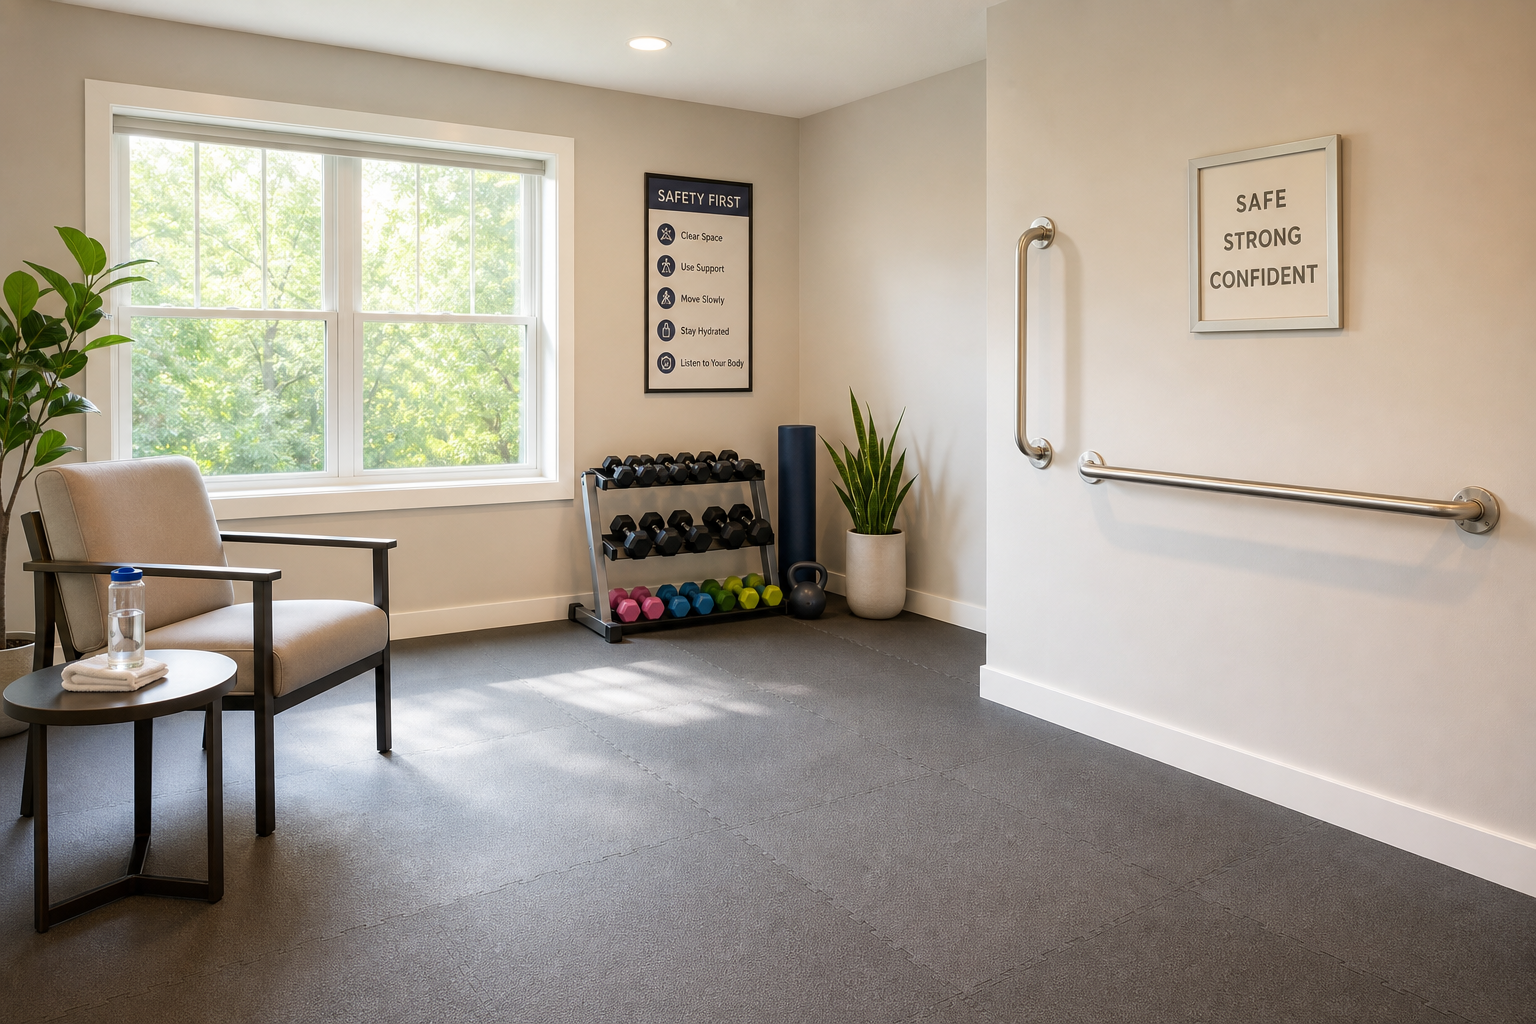
A grab bar mounted to wall studs at hip height (33-36 inches) provides a secure handhold for all standing exercises. Position it where you’ll do balance exercises, standing strength work, and transitions from seated to standing. A grab bar is more reliable than furniture because it’s anchored to the wall structure and won’t tip, slide, or collapse.

Wall-Mounted Grab Bar
Stainless steel 24-inch horizontal bars provide the most versatile and secure support for standing exercises
Installation requires finding wall studs with a stud finder (available at any hardware store) and mounting the bar with screws long enough to reach deep into the stud (typically 2.5-3 inches). If you’re not comfortable drilling into walls, hire a handyman. The job takes 15 minutes and competitively priced-75 in most markets.
Horizontal bars are more versatile than vertical bars. You can grip them at any point along their length, which gives you flexibility in where you position yourself relative to the wall. A 24-inch bar provides enough gripping surface for most exercises.
Stainless steel or powder-coated aluminum are the best materials. They don’t rust, they’re easy to clean, and they provide a secure grip even when hands are slightly sweaty. Avoid decorative bars designed to look like towel racks. They’re often mounted with shorter screws and can’t handle the same loading as a proper grab bar.
Test the bar after installation by pulling down on it with your full body weight. If it flexes, creaks, or moves at all, it’s not installed correctly. A properly installed grab bar should feel completely immovable.
Sturdy, Non-Rolling Chair
Your exercise chair must be heavy, stable, non-wheeled, and non-rocking. A standard wooden dining chair is ideal. Test it by leaning your full weight on the backrest. Does it tip? Push against the seat. Does it slide? If either happens, the chair is unsafe for exercise support. Place the chair against a wall during exercises where you lean on it for additional stability.
Seat height should allow your feet to rest flat on the floor with knees bent at 90 degrees. If the chair is too high, your feet dangle and you can’t push off effectively during sit-to-stand exercises. Too low and you’re working from a deep squat position that may be too challenging or hard on the knees.
Armrests are optional. They provide extra support for getting in and out of the chair but can interfere with some exercises (like seated side leg raises). If your chair has armrests, make sure they’re securely attached and don’t wobble.
Chair weight is safety. A lightweight chair is easy to knock over. A heavy wooden chair stays put. If your chair feels light, add stability by pushing it firmly against a wall before each use.
Clear Floor Space
Remove every item from the exercise area floor: rugs, cords, shoes, pet toys, small furniture, and decorative items. The floor should be completely clear within your 6×8 foot space plus a 2-foot buffer zone around the perimeter. This buffer prevents you from tripping on objects just outside your exercise area during steps, lunges, and weight shifts.
Extension cords are a common tripping hazard. If you need power for a fan or device, run the cord along the wall and tape it down with flat cord covers. Never run a cord across an open floor area.
Area rugs create two hazards: they slide underfoot during lateral movements, and their edges catch toes during steps. Remove them completely or secure them with rug grippers on all four corners. Even then, a rug on a hard floor is less stable than the bare floor itself.
Pet beds, water bowls, and toys migrate. If you exercise in a shared space, establish a pre-exercise routine: scan the floor, move anything that’s appeared since your last session, put it outside the buffer zone.
Furniture edges within the movement area are dangerous even when you’re not touching the furniture. During a stumble or loss of balance, you instinctively reach for something to catch yourself. If that something has a sharp corner (coffee table, end table, chair arm), you can get hurt even if you don’t fall. Round-edged furniture is safer. Sharp-edged furniture should be moved out of reach.
Overhead Lighting
A ceiling light or bright floor lamp should illuminate the entire exercise area without shadows. Your balance system relies on vision, and dim or uneven lighting degrades visual balance input. If the room has a single light source that creates shadows, add a second light on the opposite side to eliminate dark spots.
Light should come from above, not from eye level. A lamp positioned at eye level creates glare, which makes you squint and reduces visual clarity. Ceiling lights or tall floor lamps aimed at the ceiling (which reflects light downward) provide even illumination without glare.
Brightness matters more than you think. Dim lighting forces your eyes to work harder, which creates eye strain and reduces your ability to see the floor surface, mat edges, and obstacles. A 60-watt LED bulb (equivalent to a 100-watt incandescent) is the minimum for a small exercise space. Larger spaces need more.
If your ceiling light isn’t bright enough, add a standing floor lamp with a multi-bulb fixture. Position it so it lights the area where you’ll do balance exercises, since those require the most precise visual input.
Avoid backlighting situations where a window is behind you and your exercise area is in shadow. Close blinds or curtains during daytime exercise if they create this problem, then supplement with artificial light.
Phone Within Reach
Keep your phone on a shelf or table within the exercise area. If you fall and can’t get up, you need to call for help without crawling to another room. A medical alert device worn during exercise provides additional safety for seniors who exercise alone.
Phone placement should be consistent. Always put it in the same spot so you don’t waste mental energy remembering where it is. A small shelf or table at the edge of your mat works well. The phone should be visible from your exercise position and reachable without standing up if you’re on the floor.
Keep the phone charged and turned on. A dead phone is useless in an emergency. If you exercise early in the morning, charge the phone overnight in the exercise space so it’s there and ready.
Medical alert devices with fall detection add a layer of safety that’s particularly valuable for people who exercise alone. These devices detect sudden impacts (like a fall) and automatically call for help if you don’t respond to a check-in prompt.
Program emergency contacts into your phone with clear labels (“Call if I fall,” “Emergency contact”). In a stressful situation, you may not remember names or numbers, but you can tap a labeled contact.
Water Bottle
Dehydration degrades coordination and balance. Keep a water bottle within arm’s reach so you can drink between sets without leaving the exercise area. A bottle with a flip-top or straw-style lid is easier to use than a screw cap, which requires two hands and fine motor coordination you may not have when winded.
Room temperature water is easier on the stomach than cold water during exercise. Cold water can cause cramping in some people.