Living with arthritis doesn’t mean giving up on movement. In fact, gentle yoga can be one of the most effective ways to reduce joint pain and stiffness while improving flexibility and range of motion. The key is choosing poses that lubricate your joints without putting excessive stress on them.
The yoga poses below focus on gentle movements that work with your body, not against it. You’ll learn modifications using props like chairs, blocks, and straps that make each pose accessible, even on your stiffest days. These aren’t about pushing through pain or achieving perfect alignment. They’re about moving mindfully and breathing deeply to help your joints feel better.
Understanding How Yoga Helps Arthritis
When you have arthritis, your joints produce less synovial fluid, the natural lubricant that keeps everything moving smoothly. Gentle movement through yoga stimulates the production of this fluid while reducing inflammation in the joint capsule.
Regular yoga practice also strengthens the muscles around your joints, providing better support and stability. This takes pressure off the joints themselves and can significantly reduce pain over time. Research shows that people with arthritis who practice yoga regularly report less pain, better sleep, and improved mood.
Your breathing matters just as much as the poses themselves. Deep, controlled breathing activates your parasympathetic nervous system, which helps reduce inflammation throughout your body. Try to breathe in through your nose for a count of four, hold for two, then exhale for six. This breathing pattern can help manage pain during and after your practice.
Essential Props for Your Arthritis Yoga Practice
Having the right equipment makes all the difference when you’re working with stiff, painful joints. A thick yoga mat provides crucial cushioning for your knees, hips, and other joints that touch the floor. Look for mats at least 1/4 inch thick, or consider doubling up two mats for extra padding.
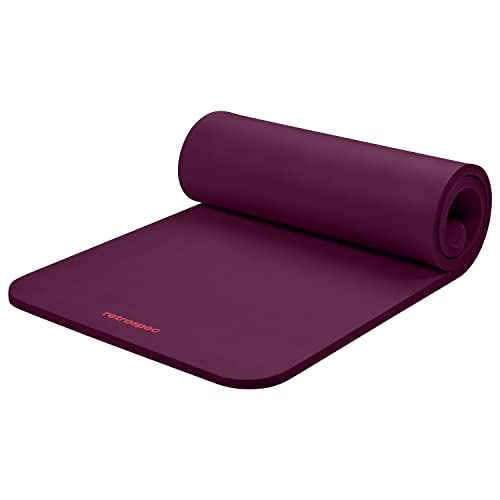
Extra Thick Yoga Mat for Seniors
Extra cushioning protects sensitive joints during floor poses and provides better stability.
Yoga blocks are essential for bringing the floor closer to you. Rather than straining to reach the ground in standing poses, you can place your hands on blocks and maintain proper alignment without stress. Foam blocks are softer and more comfortable for arthritic hands than cork or wood.
A yoga strap helps extend your reach when flexibility is limited. You can use it to hold onto your foot in stretches or to assist with shoulder mobility exercises. Choose one with loops or D-rings for easier grip adjustments.
A sturdy chair opens up an entire category of seated and supported standing poses. You don’t need anything fancy. Just make sure it’s stable and won’t slide on your mat.
15 Gentle Yoga Poses for Arthritis Relief
Seated Poses
Seated Cat-Cow: Sit on the edge of your chair with feet flat on the floor. Place your hands on your knees. As you inhale, arch your back and look up slightly. As you exhale, round your spine and drop your chin. This gentle spinal movement lubricates the vertebrae and releases tension in your back. Repeat 8-10 times, moving slowly with your breath.
Seated Spinal Twist: Sit sideways on your chair with the backrest to your right. Hold the backrest with both hands and gently twist your torso to the right, using the chair for support. Keep your hips facing forward. Hold for 5-8 breaths, then switch sides. This pose improves spinal mobility and massages your internal organs.
Ankle Circles: Extend one leg slightly and make slow circles with your ankle in both directions. Do 10 circles each way, then switch feet. This simple movement lubricates the ankle joint and improves circulation in your lower legs.
Seated Forward Fold: Sit toward the front of your chair with feet hip-width apart. Place a bolster or folded blanket on your thighs. Slowly fold forward, resting your torso on the bolster. Let your arms hang or rest them on your legs. Stay here for 10-15 breaths. This calms your nervous system and gently stretches your lower back.

Yoga Bolster Support Cushion
Provides comfortable support for restorative poses and makes forward folds accessible.
Standing Poses (With Chair Support)
Supported Mountain Pose: Stand behind your chair, holding the backrest lightly. Press evenly through both feet and lengthen your spine. Take 8-10 deep breaths here, focusing on your posture and balance. This foundational pose improves posture and body awareness.
Chair-Supported Warrior I: Stand behind your chair and step your left foot back about two feet. Keep your right foot forward and bend your right knee slightly. Hold the chair for balance. Keep your hips facing forward and hold for 5-8 breaths. Switch sides. This strengthens your legs and hips without excessive stress.
Standing Side Stretch: Stand behind your chair, holding it with your left hand. Reach your right arm overhead and gently lean to the left, creating a curve along your right side. Hold for 5 breaths, then switch sides. This stretches the muscles between your ribs and improves shoulder mobility.
Floor Poses (With Modifications)
Supported Child’s Pose: Kneel on your mat with a bolster or stack of folded blankets between your knees. Sit your hips back and rest your torso on the support. Turn your head to one side. Stay here for 1-2 minutes, breathing deeply. This restorative pose gently opens your hips and releases back tension.
Supine Knee to Chest: Lie on your back with knees bent and feet flat. Draw one knee toward your chest, holding behind your thigh (not on the knee joint itself). Hold for 8-10 breaths, then switch legs. You can also use a strap looped around your thigh if reaching is difficult. This releases tension in your lower back and hips.
Reclined Spinal Twist: Lie on your back with knees bent. Drop both knees to the right while keeping your shoulders flat. Extend your arms out to the sides. Hold for 10-15 breaths, then switch sides. Place a folded blanket under your knees for extra support if needed.
Supported Bridge: Lie on your back with knees bent and feet flat, hip-width apart. Place a yoga block under your sacrum (the flat bone at the base of your spine) at its lowest height. Let your body rest on the block for 1-2 minutes. This gentle backbend opens your chest and hip flexors.
Legs Up the Wall: Sit sideways next to a wall, then swing your legs up as you lie back. Your body forms an L-shape with your legs resting against the wall. Stay here for 5-10 minutes. This restorative pose reduces swelling in your feet and ankles while calming your nervous system.
Hand and Wrist Exercises
Finger Flexion and Extension: Make a gentle fist, then slowly extend your fingers wide. Repeat 10 times. This maintains mobility in your finger joints and can help prevent morning stiffness.
Wrist Circles: Extend your arms forward and make slow circles with your wrists in both directions. Do 10 circles each way. This lubricates your wrist joints and helps prevent carpal tunnel symptoms.
Prayer Pose Wrist Stretch: Bring your palms together at your chest in prayer position. Slowly lower your hands toward your waist while keeping your palms together, feeling a gentle stretch in your wrists and forearms. Hold for 5-8 breaths.
Creating Your Arthritis Yoga Routine
Start with just 10-15 minutes daily rather than pushing for longer sessions a few times per week. Consistency matters more than duration when you’re managing arthritis. Your joints respond better to frequent, gentle movement than occasional intense practice.
Listen to your body and distinguish between the discomfort of stiffness (which often improves with movement) and sharp pain (which means you need to back off). You should never force a pose or push through sharp pain. Some days you’ll be able to do more than others, and that’s perfectly fine.
Practice at the same time each day if possible. Many people with arthritis find that gentle yoga in the morning helps reduce stiffness throughout the day. Others prefer evening practice to release tension before bed. Experiment to find what works for your body.
Warm your joints before practicing. A warm shower or bath beforehand can make poses more comfortable. You can also use heating pads on particularly stiff joints, or try practicing in a warmer room.
Breathing Techniques for Pain Management
Your breath is a powerful tool for managing arthritis pain. When you’re hurting, you naturally hold your breath or breathe shallowly. This creates tension and actually increases pain perception.
Practice diaphragmatic breathing by placing one hand on your chest and one on your belly. Breathe so that only your belly hand moves while your chest stays relatively still. This activates your vagus nerve, which helps regulate inflammation and pain response.
Try 4-7-8 breathing for pain relief: inhale for 4 counts, hold for 7, exhale for 8. The extended exhale triggers your relaxation response and can provide immediate pain relief. Do this for 3-5 cycles whenever pain flares up.
During poses, maintain steady breathing. If you notice you’re holding your breath, that’s a sign you’ve gone too deep into the pose. Back off until you can breathe comfortably again.
Frequently Asked Questions
How long should I hold each yoga pose with arthritis?
Hold gentle stretches for 5-15 breaths (about 30-90 seconds) rather than pushing for longer holds. Stiff joints need time to release, but holding too long can cause fatigue and strain. For strengthening poses like Warrior I, start with 3-5 breaths and gradually build up. Restorative poses like Legs Up the Wall can be held for several minutes since they’re fully supported.
Should I practice yoga on days when my arthritis is flaring?
Gentle movement often helps during mild flares, but you should modify your practice significantly. Focus on breathing exercises, gentle range-of-motion movements, and restorative poses with lots of props. Skip any pose that increases your pain. During severe flares with significant swelling and heat in your joints, rest is usually better than practice. Always consult with your doctor about exercise during flares.
What’s the difference between good pain and bad pain in yoga?
Good discomfort feels like a gentle pulling or stretching sensation that stays at a 3-4 out of 10 intensity and often decreases as you hold the pose. Bad pain is sharp, sudden, or gets worse as you hold the position. It might feel like burning, pinching, or stabbing. Any pain above 5 out of 10, or pain that lingers after you release the pose, means you’ve gone too far. Joint pain should decrease with proper yoga practice, not increase.
This article